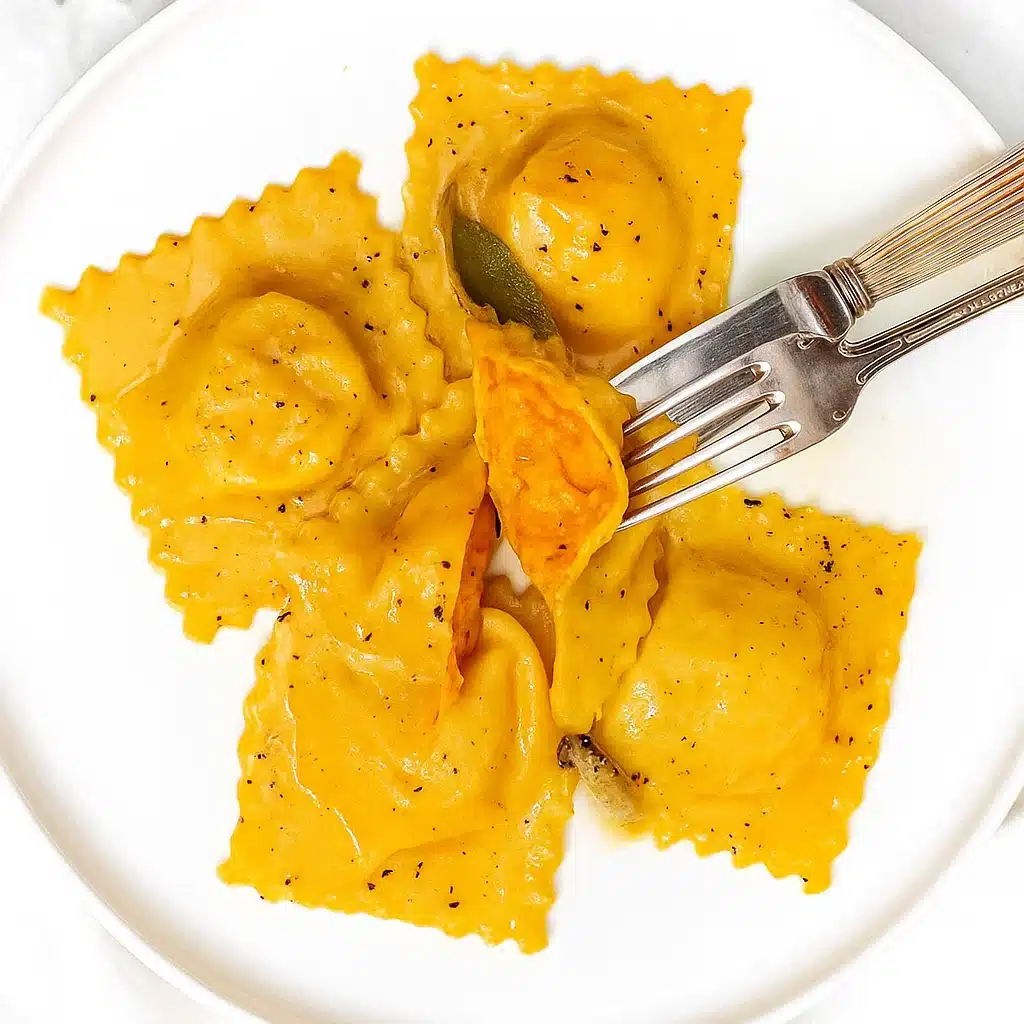
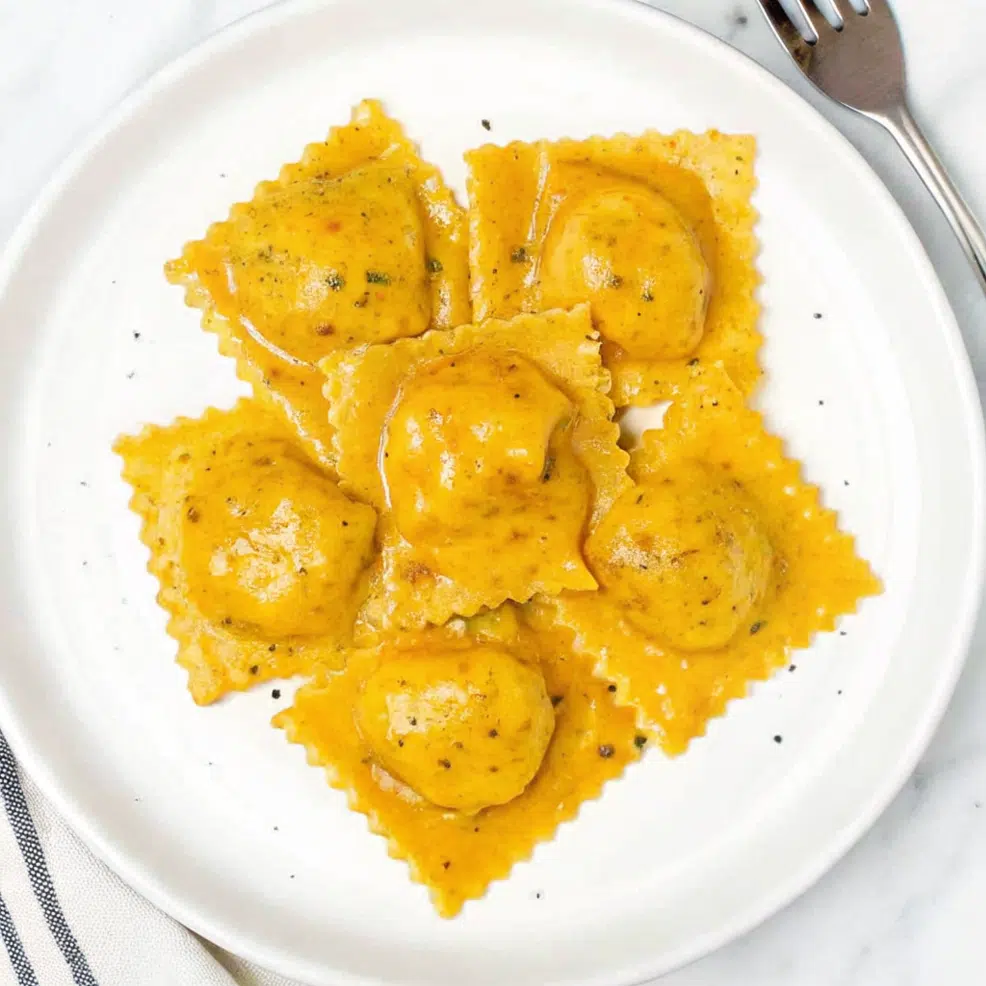
Butternut Squash Ravioli are what made me fall in love with homemade pasta. The first time I tasted them, I took one bite, closed my eyes, and let out that little mmm without even thinking. They were soft, flavorful, and filled with a creamy blend of butternut squash, ricotta, and parmesan. I couldn’t believe something this comforting could be made from scratch—and now, I’m completely hooked.
Now I make these golden pillows of heaven every single weekend because honestly, why would I stop? The sweet, creamy filling wrapped in silky pasta and tossed in nutty brown butter is basically autumn on a plate.
Love Pumpkin Recipes? Try my Roasted Butternut Squash Pasta or this Spicy Butternut Squash Pasta next.

Why You’ll Love This Recipe
Look, I’ve tried every pasta dish under the sun, but nothing hits quite like these butternut squash pockets of joy. The filling is stupid-simple – just roasted squash mixed with creamy ricotta and sharp parmesan. But when you add that brown butter sage situation? Game over. My kids literally fight over the last piece, and my husband keeps “sneaking” extras from the kitchen thinking I don’t notice.
Print
Homemade Butternut Squash Ravioli
- Total Time: 1 hour
- Yield: About 40 ravioli
Description
Step-by-step recipe for making butternut squash ravioli from scratch with brown butter sage sauce.
Ingredients
For the Pasta Dough:
- 2 cups all-purpose flour, plus extra for dusting
- 3 large eggs
- 1 tablespoon olive oil
- 1 teaspoon salt
- 2–3 tablespoons water (if needed)
For the Butternut Squash Filling:
- 2 pounds butternut squash, peeled and cubed
- 1 cup whole milk ricotta cheese
- ½ cup freshly grated Parmesan cheese, plus extra for serving
- 2 tablespoons fresh sage leaves, finely chopped
- ½ teaspoon ground nutmeg
- 1 teaspoon salt
- ½ teaspoon black pepper
- 2 tablespoons olive oil
For the Brown Butter Sage Sauce:
- 6 tablespoons unsalted butter
- 8–10 fresh sage leaves
- Pinch of salt
- Freshly grated Parmesan cheese for serving
Instructions
Preparing the Butternut Squash Filling:
- Crank your oven to 400°F. Chop up that butternut squash into chunks – doesn’t have to be perfect, just bite-sized. Toss with olive oil, salt, and pepper on a big baking sheet.
- Roast for 45 minutes until the edges get all golden and caramelized. You’ll smell it when it’s ready – trust your nose on this one.
- Let it cool down completely before you do anything else. Hot squash plus cheese equals watery mess, and nobody wants that. I usually mash mine with a fork because I like some texture, but food processor works if you want it super smooth.
- Mix everything together – the mashed squash, ricotta, parmesan, chopped sage, nutmeg, salt, and pepper. Taste it and adjust because this filling should be incredible on its own.
Making the Pasta Dough:
- Make a little volcano with your flour on the counter and crack those eggs right in the middle. Add the olive oil and salt too.
- Start mixing with a fork like you’re scrambling eggs, slowly pulling in flour from the sides. Keep going until it looks like a shaggy mess.
- Now comes the arm workout – knead this thing for about 10 minutes until it’s smooth and bouncy. If it’s too sticky, add flour. Too dry? Sprinkle some water.
- Wrap it up and let it chill for 30 minutes. This isn’t optional – the dough needs time to relax just like we do.
Assembling the Ravioli:
- Cut your dough into 4 pieces and work with one at a time. Keep the others covered so they don’t dry out. Roll it through the pasta machine or by hand until it’s thin enough to almost see through.
- Plop spoonfuls of filling about 2 inches apart on half the pasta sheet. Don’t get greedy with the filling – I learned this lesson the hard way when half my ravioli exploded in the pot.
- Brush water around each mound then fold the pasta over. Press down gently to seal, making sure you squeeze out any air bubbles.
- Cut them apart with a ravioli cutter or just use a knife. Put them on a floured tray and cover with a damp towel so they don’t turn into pasta jerky.
Cooking and Serving:
- Get a big pot of water boiling and salt it like crazy – it should taste like the ocean.
- While that’s heating up, make the sauce. Melt the butter in a pan over medium heat and keep swirling it around until it turns golden brown and smells nutty. Toss in the sage leaves and let them get crispy.
- Drop the ravioli in the boiling water and cook for about 4 minutes until they float. Don’t walk away – pasta waits for no one.
- Fish them out with a slotted spoon and drop them right into the brown butter. Give everything a gentle toss and serve immediately with extra parmesan because life’s too short for naked pasta.
Notes
Here’s what I’ve learned from making approximately a million batches of these things: don’t stuff them like little pillows – about a teaspoon of filling max or they’ll burst. Keep your assembled ravioli under a damp towel because dried pasta is the enemy. And seriously, freeze extras on baking sheets before bagging them up – they’ll keep for months and cook straight from frozen.
The brown butter thing? Go slow. I used to crank the heat and end up with black butter which tastes like burnt sadness instead of nutty goodness.
Mistakes I’ve Made So You Don’t Have To:
- Using wet squash (soggy disaster)
- Rolling pasta too thick (chewy nightmare)
- Sealing with too much water (weak seals that pop)
- Rushing the brown butter (burnt and bitter)
- Prep Time: 45 minutes
- Cook Time: 5 minutes
- Category: Main Course
- Method: Roasting
- Cuisine: Italian-American
Ingredient List
For the Pasta Dough:
- 2 cups all-purpose flour, plus extra for dusting
- 3 large eggs
- 1 tablespoon olive oil
- 1 teaspoon salt
- 2-3 tablespoons water (if needed)
For the Butternut Squash Filling:
- 2 pounds butternut squash, peeled and cubed
- 1 cup whole milk ricotta cheese
- ½ cup freshly grated Parmesan cheese, plus extra for serving
- 2 tablespoons fresh sage leaves, finely chopped
- ½ teaspoon ground nutmeg
- 1 teaspoon salt
- ½ teaspoon black pepper
- 2 tablespoons olive oil
For the Brown Butter Sage Sauce:
- 6 tablespoons unsalted butter
- 8-10 fresh sage leaves
- Pinch of salt
- Freshly grated Parmesan cheese for serving
Substitution Notes: No ricotta in the fridge? Cottage cheese works but blend it smooth first or you’ll get lumpy filling. Fresh sage not around? Skip the dried stuff and just use extra parmesan instead. Can’t find butternut squash? Acorn squash tastes pretty much the same.
Why These Ingredients Work
Okay, real talk – the butternut squash needs to be roasted until it’s almost caramelized because that’s where all the magic happens. Raw squash is boring, but roasted squash? That’s sweet, nutty heaven. I always use whole milk ricotta because the low-fat stuff just doesn’t cut it – we’re not making diet food here, people. The parmesan adds this sharp bite that balances all that sweetness, and fresh sage is non-negotiable. Dried sage tastes like cardboard compared to the real deal.
Essential Tools and Equipment
Large baking sheet, food processor or potato masher, stand mixer or your hands, pasta machine or rolling pin, ravioli cutter or sharp knife, big pot for boiling, medium pan for sauce, clean kitchen towels
How To Make Butternut Squash Ravioli
Preparing the Butternut Squash Filling:
- Crank your oven to 400°F. Chop up that butternut squash into chunks – doesn’t have to be perfect, just bite-sized. Toss with olive oil, salt, and pepper on a big baking sheet.
- Roast for 45 minutes until the edges get all golden and caramelized. You’ll smell it when it’s ready – trust your nose on this one.
- Let it cool down completely before you do anything else. Hot squash plus cheese equals watery mess, and nobody wants that. I usually mash mine with a fork because I like some texture, but food processor works if you want it super smooth.
- Mix everything together – the mashed squash, ricotta, parmesan, chopped sage, nutmeg, salt, and pepper. Taste it and adjust because this filling should be incredible on its own.
Making the Pasta Dough:
- Make a little volcano with your flour on the counter and crack those eggs right in the middle. Add the olive oil and salt too.
- Start mixing with a fork like you’re scrambling eggs, slowly pulling in flour from the sides. Keep going until it looks like a shaggy mess.
- Now comes the arm workout – knead this thing for about 10 minutes until it’s smooth and bouncy. If it’s too sticky, add flour. Too dry? Sprinkle some water.
- Wrap it up and let it chill for 30 minutes. This isn’t optional – the dough needs time to relax just like we do.
Assembling the Ravioli:
- Cut your dough into 4 pieces and work with one at a time. Keep the others covered so they don’t dry out. Roll it through the pasta machine or by hand until it’s thin enough to almost see through.
- Plop spoonfuls of filling about 2 inches apart on half the pasta sheet. Don’t get greedy with the filling – I learned this lesson the hard way when half my ravioli exploded in the pot.
- Brush water around each mound then fold the pasta over. Press down gently to seal, making sure you squeeze out any air bubbles.
- Cut them apart with a ravioli cutter or just use a knife. Put them on a floured tray and cover with a damp towel so they don’t turn into pasta jerky.
Cooking and Serving:
- Get a big pot of water boiling and salt it like crazy – it should taste like the ocean.
- While that’s heating up, make the sauce. Melt the butter in a pan over medium heat and keep swirling it around until it turns golden brown and smells nutty. Toss in the sage leaves and let them get crispy.
- Drop the ravioli in the boiling water and cook for about 4 minutes until they float. Don’t walk away – pasta waits for no one.
- Fish them out with a slotted spoon and drop them right into the brown butter. Give everything a gentle toss and serve immediately with extra parmesan because life’s too short for naked pasta.

Experts Tips
My friend who worked at an Italian restaurant told me to always save some pasta water. If your sauce gets too thick, splash some of that starchy water in there and everything comes together perfectly. Also learned from watching cooking shows that you should taste your filling before stuffing the pasta – it needs to be well-seasoned since the pasta itself is pretty bland.
You Must Know
Listen up because this is important – your dough absolutely HAS to rest for at least 30 minutes or you’ll be fighting with rubber bands instead of rolling pasta. Also, and I cannot stress this enough, let that butternut squash cool completely before mixing it with the cheese. Hot squash equals watery filling equals soggy, sad ravioli.
Personal Secret: I always roast an extra squash and freeze the puree in ice cube trays. Pop a few cubes into soup, risotto, or just thaw them for quick ravioli filling whenever the craving hits!
Pro Tips & Cooking Hacks
Here’s what I’ve learned from making approximately a million batches of these things: don’t stuff them like little pillows – about a teaspoon of filling max or they’ll burst. Keep your assembled ravioli under a damp towel because dried pasta is the enemy. And seriously, freeze extras on baking sheets before bagging them up – they’ll keep for months and cook straight from frozen.
The brown butter thing? Go slow. I used to crank the heat and end up with black butter which tastes like burnt sadness instead of nutty goodness.
Mistakes I’ve Made So You Don’t Have To:
- Using wet squash (soggy disaster)
- Rolling pasta too thick (chewy nightmare)
- Sealing with too much water (weak seals that pop)
- Rushing the brown butter (burnt and bitter)
Flavor Variations & Suggestions
Want to shake things up? Add a pinch of red pepper flakes to the filling if you like a little heat. I’ve also done a version with crispy pancetta mixed in that made my meat-loving brother-in-law actually cry tears of joy. For my sweet tooth friends, try adding a tablespoon of maple syrup to the filling – sounds weird but tastes incredible.
Sometimes I throw in some toasted pine nuts for crunch, or swap the sage for fresh thyme when I’m feeling fancy. And honestly? These are amazing with just a simple marinara if you’re not in the mood for brown butter, though I can’t imagine why you wouldn’t be.
Make-Ahead Options
This is perfect for those Sunday meal prep sessions. I make the filling up to 2 days ahead and keep it covered in the fridge – actually tastes better after the flavors have time to mingle. The pasta dough is also happy to hang out in the fridge overnight wrapped tight in plastic.
For the ultimate lazy weeknight dinner, I assemble huge batches of ravioli and freeze them on baking sheets. Once they’re solid, into freezer bags they go for up to 3 months. Cook them straight from frozen – just add an extra minute or two to the pot.
Recipe Notes & Baker’s Tips
Your filling should be thick enough to hold its shape but not so thick you can’t spread it easily. If it seems too wet after mixing, throw in a bit more parmesan to soak up the moisture – extra cheese never hurt anybody.
Don’t panic if your pasta tears while rolling – just patch it up and keep going. Fresh pasta is way more forgiving than you think, and honestly, rustic-looking ravioli taste just as good as perfect ones.
Serving Suggestions
These beauties work as a main course for 4 hungry people or stretch to feed 6 if you’re doing multiple courses. I love serving them with a simple arugula salad tossed with lemon juice – the peppery bite cuts through all that rich butteriness perfectly.
Wine-wise, anything crisp and white works great. I usually grab whatever Pinot Grigio is on sale because let’s be real, the ravioli are the star here. For dessert, keep it simple with some good vanilla gelato or fresh berries.
I hope this becomes your new weekend project – there’s honestly nothing better than the smell of brown butter filling your kitchen while you wait for those little pasta pillows to float to the surface. Pure magic, I tell you!
How to Store Your Butternut Squash Ravioli
Fresh stuff: Keep uncooked ravioli in the fridge for maybe 24 hours max on a floured tray with a damp towel over them.
Leftovers: Cooked ravioli last about 3 days in the fridge in a container. Reheat them gently in a pan with a little butter or broth.
Freezer: Uncooked ravioli freeze great for up to 3 months. Just cook them straight from frozen and add a couple extra minutes.
Allergy Information
This has: Gluten from the flour, eggs in the pasta, dairy from ricotta, parmesan, and butter
Going gluten-free? Use a gluten-free flour blend for the pasta but it won’t have the same texture No dairy? Try cashew cream instead of ricotta and nutritional yeast instead of parmesan No eggs? Mix flour and water with olive oil but honestly it’s not the same
Questions I Get Asked A Lot
Can I just buy pasta sheets instead of making my own?
Yeah totally! Look in the refrigerated section for fresh pasta sheets. You’ll need about a pound.
How do I know when they’re done?
They float to the top and feel tender when you poke them with a spoon, usually takes about 4 minutes.
Can I make this vegan?
Sure, use cashew ricotta, nutritional yeast instead of parmesan, and vegan butter for the sauce.
Why do my ravioli keep bursting?
Either you stuffed them too full or didn’t seal the edges tight enough. Press out the air bubbles and really pinch those edges.
Can I roast the squash ahead of time?
Absolutely, roast it up to 3 days ahead and keep it covered in the fridge.
💬 Did you try making these? Drop a comment below and tell me how it went! I want to see photos of your ravioli adventures and hear if you added any crazy variations that worked out.


