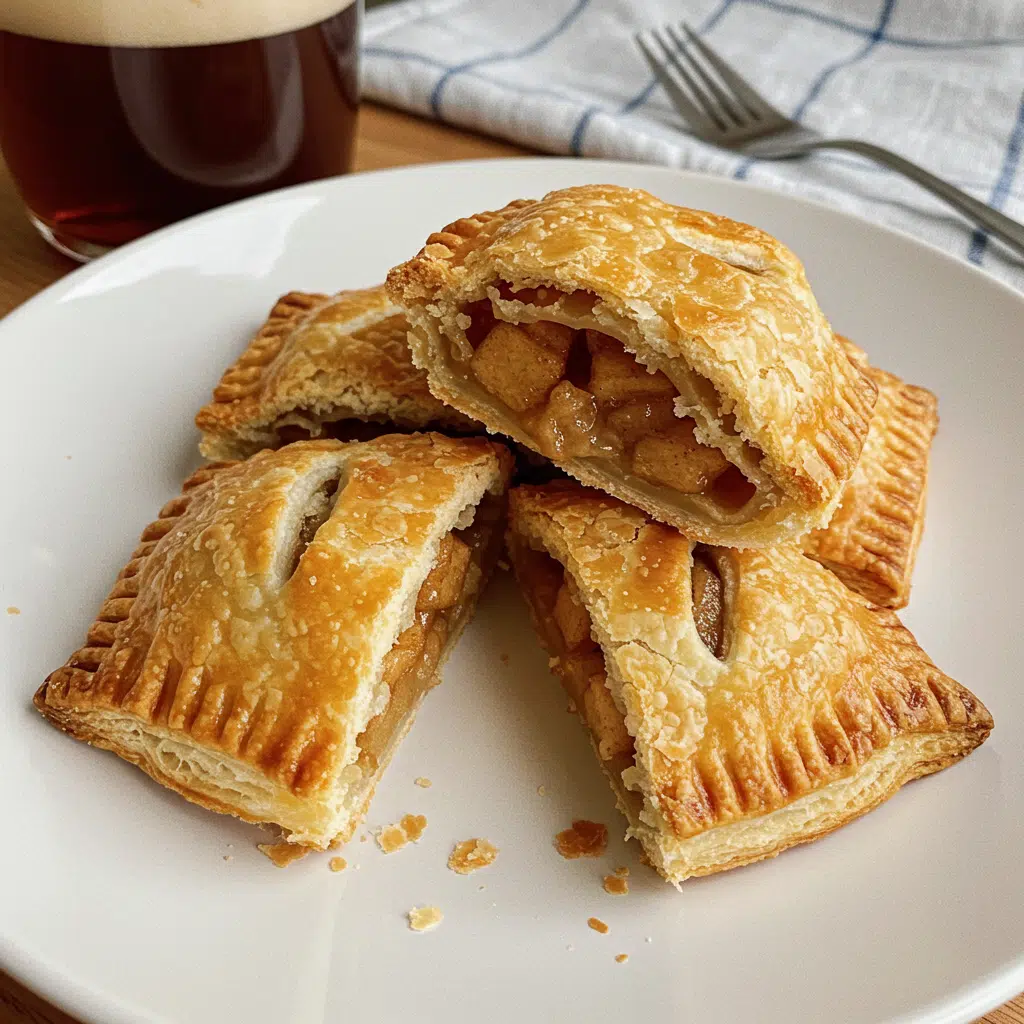
Mini apple pies with puff pastry are a hot and sweet dessert treat you’ll want on repeat! Made with buttery, flaky puff pastry and filled to the brim with a gooey, cinnamon-spiced apple filling, they’re baked to golden perfection and finished with a beautifully folded or decorated top. The warm apple spice aroma is simply irresistible fresh out of the oven — cozy, comforting, and perfect for fall (or anytime a sweet craving strikes!).
Love More Dessert Recipes? Try My Mini Apple Tarts or this Pumpkin Pie Recipe next.

Why You’ll Love This Recipe
These are everything you crave in a cozy apple dessert — perfectly portioned, unbelievably easy, and totally irresistible. That first bite through the crisp, golden pastry into warm, cinnamon-spiced apples is pure magic. And the best part? They look impressive, but all you really did was press some dough into a muffin tin. No peeling, no stress, just flaky, gooey perfection every time.
Print
Mini Apple Pies With Puff Pastry
- Total Time: 45 minutes
- Yield: 9 mini pies
Description
Easy mini apple pies made with puff pastry and a simple homemade apple filling. These individual desserts are baked in a muffin tin for the perfect portion size.
Ingredients
For the Apple Filling:
- 4 small apples (or 3 medium), diced small – Honeycrisp are my ride-or-die
- 1 tablespoon butter
- 2–3 tablespoons brown sugar (I always go for 3 because… life’s short)
- ½ teaspoon ground cinnamon
For Assembly:
- 1 sheet puff pastry, thawed (Pepperidge Farm is my go-to)
- 1 egg + 1 teaspoon water for egg wash (skip if you’re lazy, I won’t judge)
- Powdered sugar for dusting (makes everything prettier)
Instructions
1. Make the Apple Filling
Throw those apples, butter, brown sugar, and cinnamon in your skillet over medium heat. It’s gonna smell like fall threw a party in your kitchen – you’re welcome.
Let them hang out uncovered for 2-3 minutes, giving them a stir so nobody burns. They’ll start getting shiny and releasing their juices like little apple tears of joy.
Slap that lid on, turn the heat down to medium-low, and let them steam for about 10 minutes. This is when the magic happens – they get tender without turning to baby food.
Take the lid off (watch the steam!) and cook another 2-3 minutes until that syrup thickens up and hugs the apples. Set it aside to cool while you pretend you’re not eating spoonfuls straight from the pan.
2. Prepare the Pastry
Crank that oven to 425°F – we need it hot for maximum puff action.
Grease 9 cups of your muffin tin. I use cooking spray because who has time for buttering individual cups? Not this girl.
Roll out your puff pastry just enough to smooth it out (we’re not making a pizza here). Cut it into 9 squares – I eyeball it because perfect squares are overrated.
Press each square into a muffin cup, letting the corners stick up all willy-nilly. They look like little pastry flowers, and honestly? Adorable.
3. Fill and Fold
Drop about 2½-3 tablespoons of filling into each cup. Don’t get greedy – overfilling leads to apple explosions (ask me how I know).
Here’s the fun part: fold those corners over the filling, overlapping them in the middle. Give ’em a little pinch to stick together, but leave gaps for steam. They’ll look like wonky little packages, and that’s exactly right.
4. Bake
Brush with egg wash if you’re feeling fancy. Sometimes I do, sometimes I’m already washing dishes and can’t be bothered.
Into the oven for 20-25 minutes until they’re golden brown and puffed up like little pastry peacocks. Your house will smell so good, neighbors might mysteriously appear.
5. Cool and Serve
This is the hardest part – waiting. Let them chill in the pan for 5-8 minutes or they’ll fall apart faster than my New Year’s resolutions.
Carefully pop them out onto a cooling rack. Hit them with powdered sugar if you’re serving to impress, or just eat them straight up if it’s a Tuesday night.
Notes
Crispy bottom guarantee: Put your muffin tin on a pizza stone or upside-down baking sheet. Bottom heat = no soggy bottoms
Biggest mistake people make: Using hot filling with cold pastry. That steam turns your puff into mush faster than rain on a picnic
Time-saving hack: Double the filling, freeze half. Future you will send present you a thank-you card
Lazy person’s win: Don’t peel the apples. More fiber, more color, less work. Triple win.
- Prep Time: 20 minutes
- Cook Time: 25 minutes
- Category: Dessert
- Method: Baking
- Cuisine: American
Ingredient List (Makes 9 mini pies)
For the Apple Filling:
- 4 small apples (or 3 medium), diced small – Honeycrisp are my ride-or-die
- 1 tablespoon butter
- 2–3 tablespoons brown sugar (I always go for 3 because… life’s short)
- ½ teaspoon ground cinnamon
For Assembly:
- 1 sheet puff pastry, thawed (Pepperidge Farm is my go-to)
- 1 egg + 1 teaspoon water for egg wash (skip if you’re lazy, I won’t judge)
- Powdered sugar for dusting (makes everything prettier)
Substitution Notes:
- Apples: Whatever’s on sale works – just avoid Red Delicious (they turn to mush)
- Butter: Coconut oil or vegan butter if dairy’s not your thing
- Brown sugar: Maple syrup gives amazing flavor but makes filling runnier
Why These Ingredients Work
Okay, chemistry lesson time (but make it fun). Those apples need to be diced small so they actually cook through without turning your pastry into a swimming pool. Trust me, I learned this the hard way.
Brown sugar isn’t just for sweetness – it creates this gorgeous caramel situation with the apple juices that regular sugar just can’t match. It’s like the difference between a good hug and a GREAT hug.
Butter makes everything better (shocking, I know), but here it’s creating this silky coating on the apples that keeps them from drying out. It’s basically apple armor.
And puff pastry? That’s just store-bought magic. All those buttery layers doing their thing while you take all the credit. Work smarter, not harder, friends.
Essential Tools and Equipment
- Standard 12-cup muffin tin (the one hiding in your cabinet)
- Sharp knife (dull knives and apple dicing = bad time)
- Medium skillet with a lid
- Pastry brush (or just use your fingers for egg wash)
- Cooling rack
- Rolling pin (or wine bottle – no judgment here)
How To Make Mini Apple Pies With Puff Pastry
1. Make the Apple Filling
Throw those apples, butter, brown sugar, and cinnamon in your skillet over medium heat. It’s gonna smell like fall threw a party in your kitchen – you’re welcome.
Let them hang out uncovered for 2-3 minutes, giving them a stir so nobody burns. They’ll start getting shiny and releasing their juices like little apple tears of joy.
Slap that lid on, turn the heat down to medium-low, and let them steam for about 10 minutes. This is when the magic happens – they get tender without turning to baby food.
Take the lid off (watch the steam!) and cook another 2-3 minutes until that syrup thickens up and hugs the apples. Set it aside to cool while you pretend you’re not eating spoonfuls straight from the pan.
2. Prepare the Pastry
Crank that oven to 425°F – we need it hot for maximum puff action.
Grease 9 cups of your muffin tin. I use cooking spray because who has time for buttering individual cups? Not this girl.
Roll out your puff pastry just enough to smooth it out (we’re not making a pizza here). Cut it into 9 squares – I eyeball it because perfect squares are overrated.
Press each square into a muffin cup, letting the corners stick up all willy-nilly. They look like little pastry flowers, and honestly? Adorable.
3. Fill and Fold
Drop about 2½-3 tablespoons of filling into each cup. Don’t get greedy – overfilling leads to apple explosions (ask me how I know).
Here’s the fun part: fold those corners over the filling, overlapping them in the middle. Give ’em a little pinch to stick together, but leave gaps for steam. They’ll look like wonky little packages, and that’s exactly right.
4. Bake
Brush with egg wash if you’re feeling fancy. Sometimes I do, sometimes I’m already washing dishes and can’t be bothered.
Into the oven for 20-25 minutes until they’re golden brown and puffed up like little pastry peacocks. Your house will smell so good, neighbors might mysteriously appear.
5. Cool and Serve
This is the hardest part – waiting. Let them chill in the pan for 5-8 minutes or they’ll fall apart faster than my New Year’s resolutions.
Carefully pop them out onto a cooling rack. Hit them with powdered sugar if you’re serving to impress, or just eat them straight up if it’s a Tuesday night.

Expert Tips
The non-negotiable rule: Cold puff pastry is happy puff pastry. Too warm = sad, flat pastries. Too frozen = cracks everywhere. Give it 10 minutes on the counter and you’re golden.
My game-changing secret: Toss a pinch of salt in with your apples. Sounds weird, tastes amazing. It’s like putting on the perfect accessories – suddenly everything just works better.
Pro Tips & Cooking Hacks
- Crispy bottom guarantee: Put your muffin tin on a pizza stone or upside-down baking sheet. Bottom heat = no soggy bottoms
- Biggest mistake people make: Using hot filling with cold pastry. That steam turns your puff into mush faster than rain on a picnic
- Time-saving hack: Double the filling, freeze half. Future you will send present you a thank-you card
- Lazy person’s win: Don’t peel the apples. More fiber, more color, less work. Triple win.
Flavor Variations
- Salted Caramel Apple: Drizzle store-bought caramel over apples, sprinkle with sea salt
- Cranberry Apple: Chuck in some dried cranberries – instant fancy
- Maple Bourbon: Swap brown sugar for maple syrup, add a splash of bourbon (kids version: skip the bourbon)
- Apple Pie Spice Bomb: Add cardamom, nutmeg, and ginger – ¼ teaspoon each
- Cheddar Apple: Hear me out – sprinkle sharp cheddar on top before baking. Mind. Blown.
Make-Ahead Options
These babies are meal prep champions:
Filling only: Make it 3 days ahead, keep it in the fridge. Warm it up a bit before using so it’s not ice cold.
Assembled, not baked: Cover with plastic wrap, fridge for 24 hours max. Add 3 minutes to baking time because cold start.
Already baked: Room temp for 2 days in a container. They get a little soft but still delicious.
Freezer stash: Bake, cool, freeze for up to 2 months. Defrost overnight, reheat at 350°F for 5 minutes. Boom – instant dessert.
Recipe Notes & Baker’s Tips
- Some apples are juicier than others. If yours are swimming, just cook the filling longer. No stress.
- Taste your apples first – super tart ones might need that extra tablespoon of sugar
- No muffin tin? Make turnovers instead. Same filling, fold the pastry in half, seal edges with a fork
- Want them extra sparkly? Turbinado sugar on top before baking makes them look bakery-fancy
Serving Suggestions
These pies are perfect naked, but if you want to guild the lily:
- Vanilla ice cream while they’re still warm (classic for a reason)
- Whipped cream with a dash of cinnamon
- Sharp cheddar on the side (don’t knock it till you try it)
- Caramel sauce drizzle for extra indulgence
- Greek yogurt for breakfast (yes, I eat pie for breakfast, fight me)
Sign Off
I seriously hope these little pies bring you as much happiness as they bring my family. There’s something about pulling out that muffin tin and seeing nine perfect golden pastries that just makes everything better. Here’s to warm kitchens, happy bellies, and the smell of cinnamon making everything right with the world!
How to Store Your Mini Apple Pies
Counter life: 2 days in a container. They’ll lose some crisp but still taste like heaven.
Fridge situation: Up to 5 days covered. Pastry goes soft but flavor stays amazing.
Freezer wins: Wrap individually, freeze up to 2 months. Thaw overnight in fridge.
Reheating magic: 350°F oven for 5-8 minutes brings back the crisp. Microwave works but makes them soft (sometimes that’s okay too).
Allergy Information
Contains: Gluten (pastry), Dairy (butter, egg)
Naturally free from: Nuts, Soy
Easy swaps:
- Gluten-free: GF puff pastry exists! Find it in the freezer section
- Dairy-free: Vegan butter, brush with oat milk instead of egg
- Egg-free: Brush with cream or plant milk for shine
Questions I Get Asked A Lot
Can I use store-bought apple pie filling?
You could, but why would you when homemade takes 15 minutes and tastes 100 times better? Plus, you control the sugar and spices.
Help! My pastry keeps ripping!
It’s probably too cold. Let it sit for 5 more minutes. If it tears, just patch it together – once baked, nobody knows.
Can I make these smaller for a party?
Totally! Use a mini muffin tin, smaller pastry squares, bake for 12-15 minutes. Adorable two-bite wonders.
What apple should I use?
Honeycrisp and Granny Smith are my favorites. Mix them for sweet-tart perfection. Just avoid Red Delicious – they turn to mush.
Do I need a bottom crust?
Nope! The beauty of this recipe is the easy single-crust situation. Less work, same delicious result.
💬 Made these mini apple pies? Tell me everything! What apples did you use? Did you try any fun variations? Drop a comment below – I read every single one and love hearing about your kitchen adventures. And hey, if you loved these, wait till you try my Brown Butter Apple Crisp Bars!


