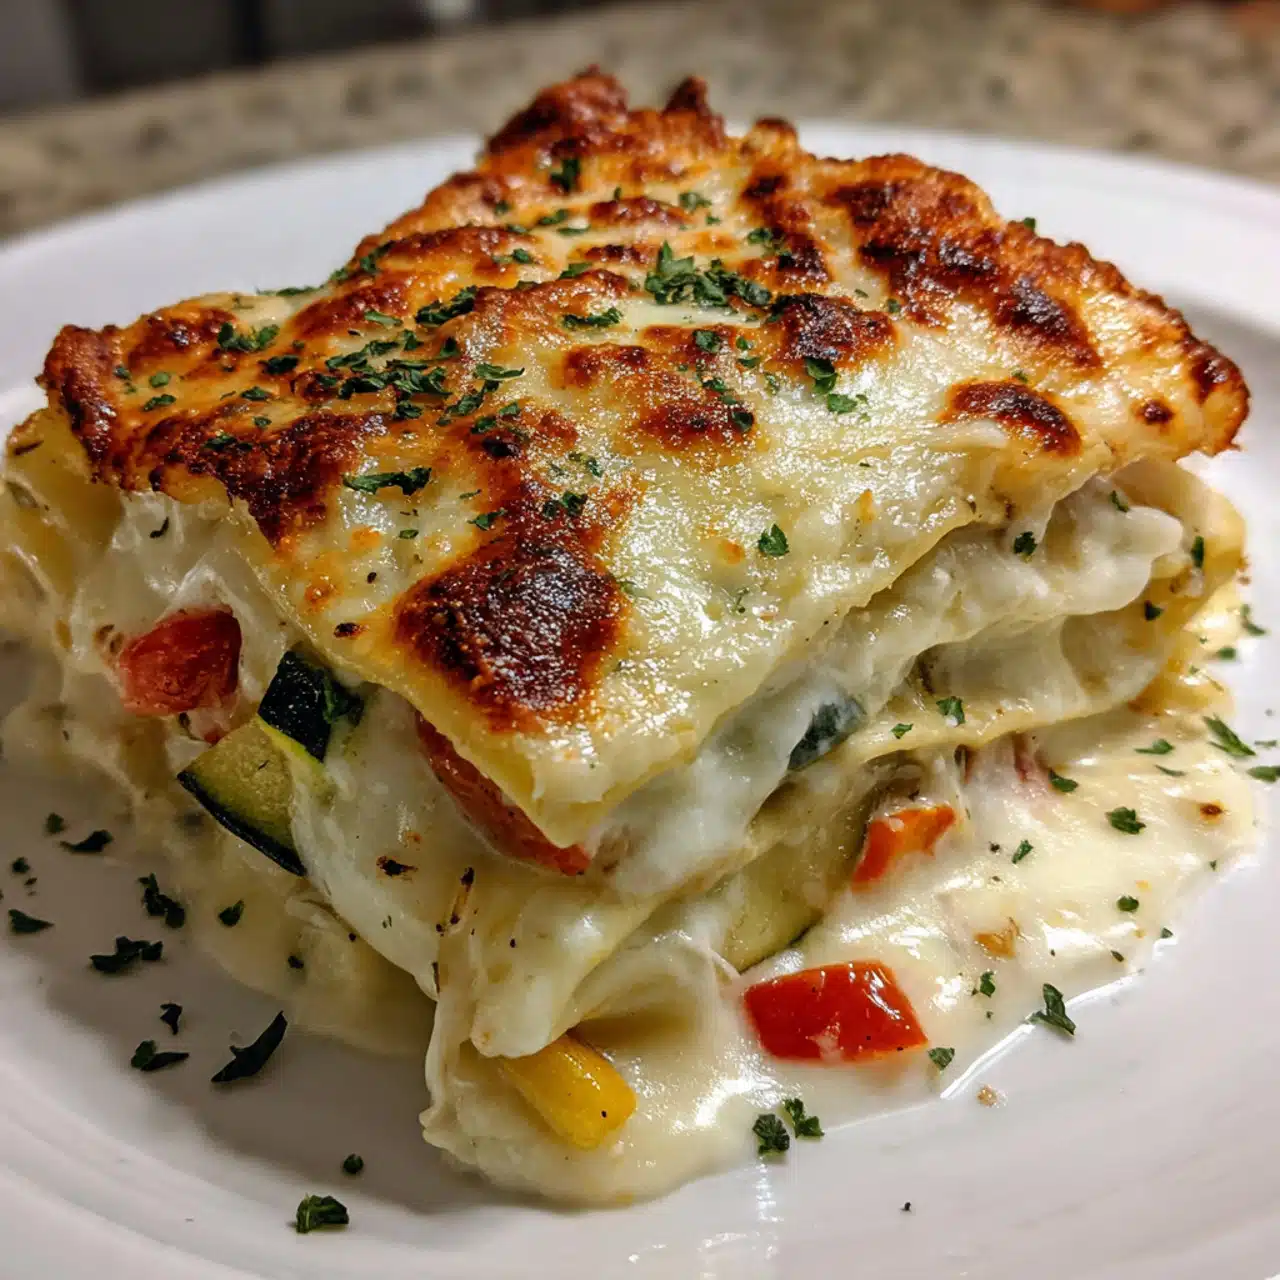
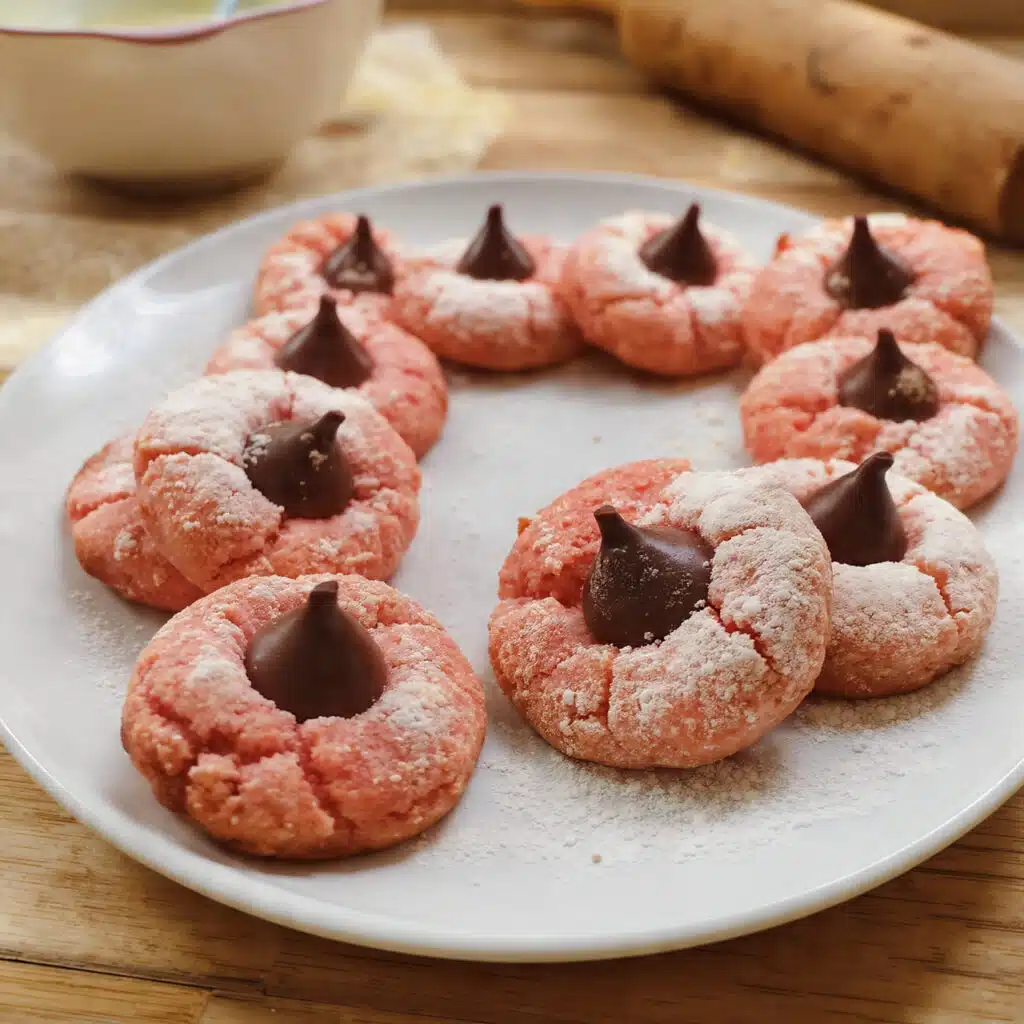
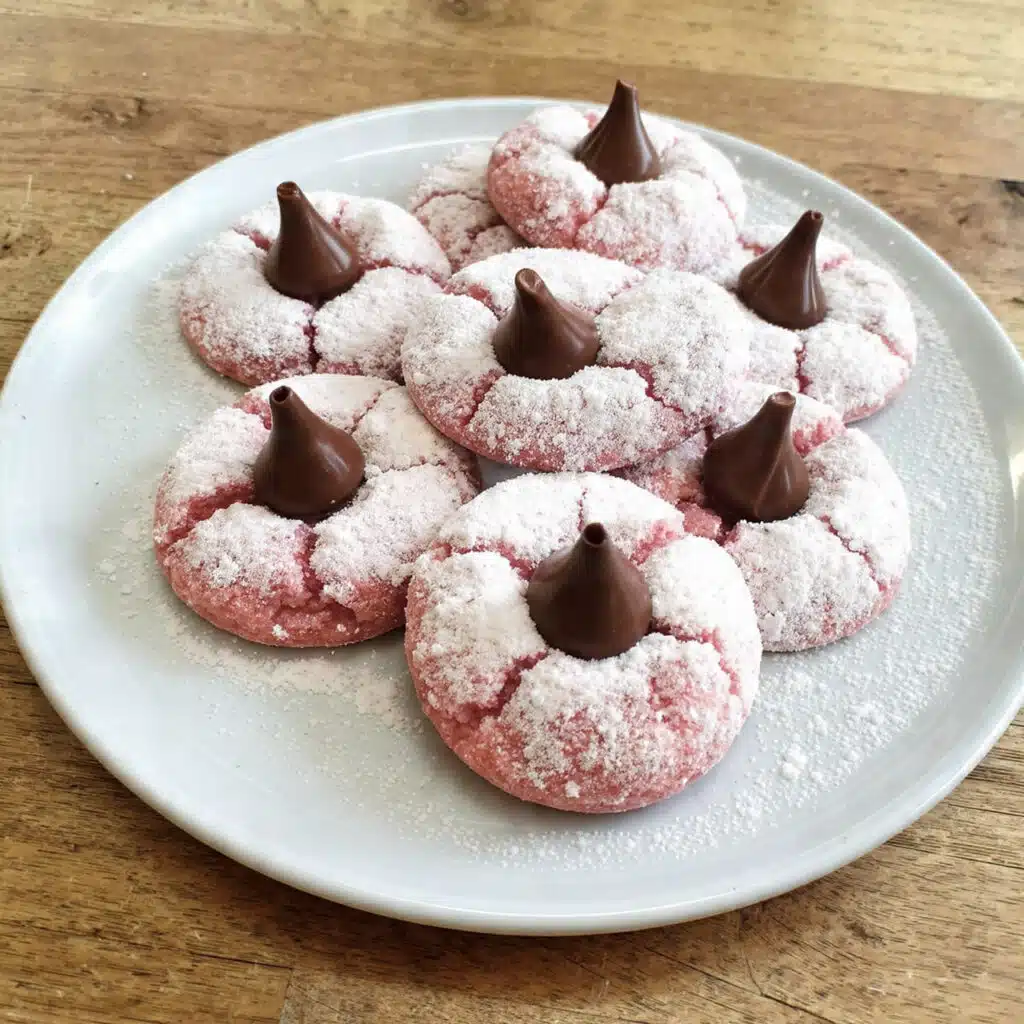
Strawberry Kiss Cookies are soft, buttery, melt-in-your-mouth treats with a gorgeous pink color and sweet strawberry flavor! They’re topped with a chocolate kiss candy and dusted with powdered sugar—making them perfect for Valentine’s Day, baby showers, or any time you want something extra special and pretty.
Love More Strawberry Desserts? Try My Strawberry Lemonade Cookies or this Strawberry Cheesecake Cookies next.
Why You’ll Love This Recipe
Soft, sweet, and delightfully pink, these Strawberry Kiss Cookies are as pretty as they are delicious. Made with strawberry-flavored dough and topped with a smooth chocolate kiss, each bite offers the perfect blend of fruity sweetness and creamy chocolate. Perfect for Valentine’s Day, parties, or anytime you crave a charming little treat.
Print
Strawberry Kiss Cookies
- Total Time: 1 hour 32 minutes
- Yield: 24-30 cookies
Description
Strawberry-flavored cookies made with gelatin mix for a beautiful pink color, topped with chocolate kiss candies and dusted with powdered sugar. These soft, melt-in-your-mouth cookies are perfect for holidays, showers, and special celebrations.
Ingredients
Cookie Dough
-
1 cup (226g) unsalted butter, softened
-
1 cup (200g) granulated sugar
-
1 large egg, at room temperature
-
1 teaspoon vanilla extract
-
½ teaspoon almond extract (optional but recommended)
-
2 cups + 2 tablespoons (280g) all-purpose flour
-
1 teaspoon baking powder
-
¼ teaspoon salt
-
1 package (3 oz) strawberry-flavored gelatin mix
For Finishing
-
¼ cup powdered sugar, for dusting
-
24–30 chocolate kiss candies, unwrapped
Instructions
Throw your softened butter and sugar into a large bowl and beat the heck out of it for 2-3 minutes until it looks lighter and fluffy. I used to rush this part and wonder why my cookies were dense as hockey pucks. Turns out those few extra minutes really matter! Add your egg, vanilla, and almond extract, then beat until everything looks smooth and combined. Dump in the strawberry Jello powder and mix until your dough turns this gorgeous pink color that makes you want to eat it raw (but don’t, obviously).
Scoop about a tablespoon of dough and roll it between your palms until it’s a smooth ball. This is actually pretty therapeutic if you’ve had a stressful day. Line them all up on a baking sheet and stick the whole thing in the fridge for at least an hour. And I mean AT LEAST an hour. My friend Sarah thought she could get away with 30 minutes and ended up with cookies that looked like they’d been run over by a car. Overnight is even better if you can plan ahead. I usually make the dough after dinner and bake them the next morning.
Get your oven going at 350°F and line your baking sheets with parchment paper. Space those cold dough balls about 2 inches apart. Here’s where I messed up the first time I made these: I pressed my thumb into the center to make a well for the kiss, thinking I was being smart. WRONG. They spread like crazy. Just leave them as balls and the kiss will settle in perfectly after baking.
Pull those cookies out and resist the urge to immediately shove a kiss on top. Set a timer for 2 minutes. I know it feels like forever but trust me. Those 2 minutes let the cookies firm up just enough that the kiss doesn’t sink all the way through. When the timer goes off, gently press a chocolate kiss right into the center of each cookie. The bottom of the kiss will soften from the heat and stick perfectly without melting into a puddle.
Transfer your cookies to a wire rack. I know they smell incredible and you want to eat one immediately, but give them at least 15 minutes to cool and firm up. The chocolate needs to set and the cookies need to finish their thing. I usually sneak one after 10 minutes anyway because I have no self-control, but you should definitely wait the full time.
Here’s a trick I figured out after getting powdered sugar all over my chocolate kisses about fifty times: dust the cookies BEFORE you add the kisses. Or wait until everything’s stone cold and dust very carefully around the chocolate. I put my powdered sugar in a fine-mesh sieve and tap it gently over the cookies for that pretty, even coating you see in bakery windows.
Notes
-
Measure your flour correctly by spooning it into the measuring cup and leveling it off with a knife. Scooping directly from the bag packs in too much flour and makes dry cookies.
-
Don’t overbake! Take them out just as the edges start to firm up. They’ll look slightly underdone in the center, but that’s perfect.
-
If your cookies do spread too much, you can gently push the edges inward with a spoon while they’re still warm to reshape them.
-
Use parchment paper or a silicone baking mat—this prevents sticking and helps cookies bake more evenly.
-
Cream the butter and sugar for the full 2-3 minutes. This creates air pockets that give you that delicate, tender texture.
-
Unwrap all your chocolate kisses before you start baking! You don’t want to be frantically unwrapping them while your hot cookies are waiting.
- Prep Time: 20 minutes
- Cook Time: 12 minutes + Chill Time: 1 hour
- Category: Dessert
- Method: Baking
- Cuisine: American
Ingredient List
Cookie Dough
- 1 cup (226g) unsalted butter, softened
- 1 cup (200g) granulated sugar
- 1 large egg, at room temperature
- 1 teaspoon vanilla extract
- ½ teaspoon almond extract (optional but recommended)
- 2 cups + 2 tablespoons (280g) all-purpose flour
- 1 teaspoon baking powder
- ¼ teaspoon salt
- 1 package (3 oz) strawberry-flavored gelatin mix
For Finishing
- ¼ cup powdered sugar, for dusting
- 24-30 chocolate kiss candies, unwrapped
Why These Ingredients Work
That strawberry Jello box sitting in your pantry? Turns out it’s a baking secret weapon. It colors the dough pink AND flavors it without adding any extra liquid that would mess up the texture. I splurge on Kerrygold butter because it’s creamier and makes these taste more expensive than they are, but regular unsalted butter works fine too.
The almond extract is technically optional, but I’m begging you not to skip it. My first batch I left it out thinking “how much difference could half a teaspoon make?” Turns out, a LOT. It makes the strawberry flavor taste more real somehow, less artificial. My husband tried both versions back-to-back and immediately could tell which was which. The baking powder gives just enough lift without puffing them up too much, and those chocolate kisses bring that whole chocolate-covered strawberry vibe without you having to actually dip anything in chocolate.
Essential Tools and Equipment
- Stand mixer or hand mixer
- Large mixing bowl
- Medium mixing bowl
- Whisk
- Measuring cups and spoons
- Cookie scoop (1 tablespoon size)
- Baking sheets
- Parchment paper or silicone baking mats
- Wire cooling rack
- Small fine-mesh sieve (for dusting powdered sugar)
How To Make Strawberry Kiss Cookies
Step 1: Prepare the Dough
Throw your softened butter and sugar into a large bowl and beat the heck out of it for 2-3 minutes until it looks lighter and fluffy. I used to rush this part and wonder why my cookies were dense as hockey pucks. Turns out those few extra minutes really matter! Add your egg, vanilla, and almond extract, then beat until everything looks smooth and combined. Dump in the strawberry Jello powder and mix until your dough turns this gorgeous pink color that makes you want to eat it raw (but don’t, obviously).
Step 2: Shape & Chill the Cookies
Scoop about a tablespoon of dough and roll it between your palms until it’s a smooth ball. This is actually pretty therapeutic if you’ve had a stressful day. Line them all up on a baking sheet and stick the whole thing in the fridge for at least an hour. And I mean AT LEAST an hour. My friend Sarah thought she could get away with 30 minutes and ended up with cookies that looked like they’d been run over by a car. Overnight is even better if you can plan ahead. I usually make the dough after dinner and bake them the next morning.
Step 3: Bake
Get your oven going at 350°F and line your baking sheets with parchment paper. Space those cold dough balls about 2 inches apart. Here’s where I messed up the first time I made these: I pressed my thumb into the center to make a well for the kiss, thinking I was being smart. WRONG. They spread like crazy. Just leave them as balls and the kiss will settle in perfectly after baking.
Step 4: Add the Chocolate Kisses
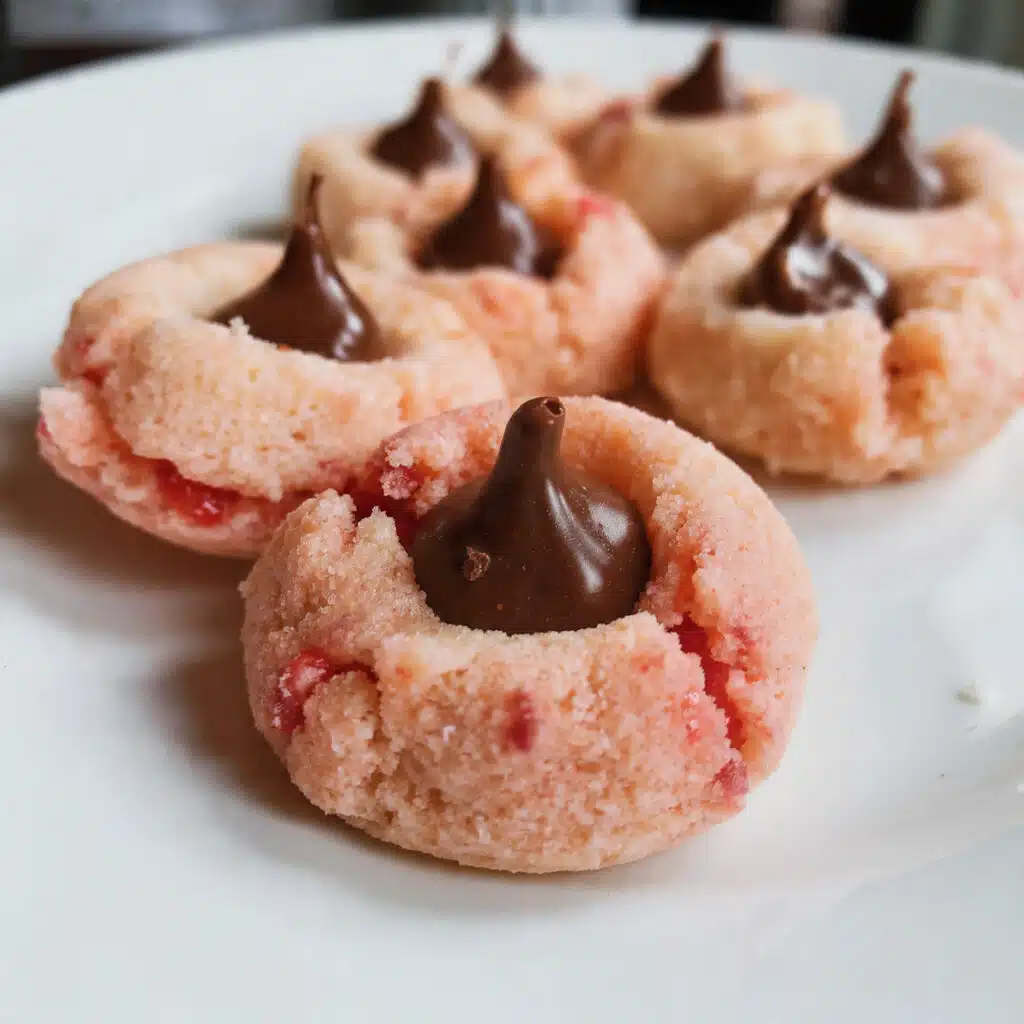
Pull those cookies out and resist the urge to immediately shove a kiss on top. Set a timer for 2 minutes. I know it feels like forever but trust me. Those 2 minutes let the cookies firm up just enough that the kiss doesn’t sink all the way through. When the timer goes off, gently press a chocolate kiss right into the center of each cookie. The bottom of the kiss will soften from the heat and stick perfectly without melting into a puddle.
Step 5: Cool Completely
Transfer your cookies to a wire rack. I know they smell incredible and you want to eat one immediately, but give them at least 15 minutes to cool and firm up. The chocolate needs to set and the cookies need to finish their thing. I usually sneak one after 10 minutes anyway because I have no self-control, but you should definitely wait the full time.
Step 6: Dust with Powdered Sugar
Here’s a trick I figured out after getting powdered sugar all over my chocolate kisses about fifty times: dust the cookies BEFORE you add the kisses. Or wait until everything’s stone cold and dust very carefully around the chocolate. I put my powdered sugar in a fine-mesh sieve and tap it gently over the cookies for that pretty, even coating you see in bakery windows.
You Must Know
I’m going to say this in all caps because it’s that important: CHILL YOUR DOUGH. I don’t care if you’re in a hurry or you think your kitchen is cold enough that it’ll be fine. Put. It. In. The. Fridge. For. At. Least. An. Hour. This is the hill I will die on. Last week someone in my recipe swap group complained these didn’t work and when I asked questions, she’d only chilled them for 20 minutes “because it seemed cold enough.” No ma’am.
Your butter situation matters too. It should be soft enough that you can press your finger into it and leave a dent, but it shouldn’t be greasy or shiny or melty. If you’re not sure, it’s better to have it too cold than too warm. Butter that’s too soft makes cookies spread like crazy. And pull your egg out of the fridge 30 minutes before you start baking so it mixes in smoothly instead of making your butter seize up.
Personal Secret: I roll one ball, chill it with the others, then bake it solo. If it spreads too much, I add a tablespoon of flour to my remaining dough. If it barely spreads at all, I drop my oven temp to 325°F for the rest. Takes an extra 12 minutes but has saved me from wasting entire batches.
Pro Tips & Cooking Hacks
Spoon your flour into the measuring cup instead of scooping directly from the bag. Scooping packs in way too much flour and you’ll end up with dry, crumbly cookies. I learned this from my grandma after years of wondering why her cookies were always better than mine.
Pull your cookies when they look almost done but not quite. The edges should be set but the center can look soft. They keep cooking on that hot pan even after they’re out of the oven. If you wait until they look perfect in the oven, you’ve already overbaked them.
If your cookies spread too much despite chilling (because ovens are weird), grab a spoon and push the edges back toward the center while they’re still warm. You can actually reshape them a bit. Won’t fix them completely but definitely helps.
Parchment paper or a silicone mat is non-negotiable for me. Makes cleanup easier and your cookies bake more evenly. I have three silicone mats and rotate them while I’m baking multiple batches.
Actually cream that butter and sugar for the full 2-3 minutes. I time it now because I always think I’ve done it long enough when I haven’t. Those air pockets you’re creating are what make these cookies tender instead of tough.
Unwrap all your kisses before you start. I made the mistake once of unwrapping as I went and ended up with lukewarm cookies and chocolate that melted everywhere because I was taking too long. Learn from my mistakes.
Flavor Variations & Suggestions
Blueberry Jello instead of strawberry gives you these gorgeous blue cookies that are perfect for baby showers. Made them for my cousin’s baby shower last summer and they were the hit of the dessert table.
If you’re trying to avoid artificial dyes, grab some freeze-dried strawberries and grind them into powder. You’ll need about 3-4 tablespoons to get good color and flavor. Or use a tiny bit of beet powder if you just want the pink color. There are also natural food coloring brands at Whole Foods that work great.
Peppermint version for Christmas: use white chocolate or peppermint kisses and swap the almond extract for peppermint. My kids go nuts for these every December.
Lemon cookies are incredible too. Use lemon Jello, add some lemon zest, top with white chocolate kisses. Made these for Easter last year and they were gone in like ten minutes.
If you’re team chocolate all the way, use chocolate cake mix instead of the Jello for double chocolate cookies. Completely different texture but so good.
Make-Ahead Options
These are perfect for busy holiday seasons when you’re trying to bake seventeen different things. Roll all your dough balls, freeze them solid on a baking sheet, then throw them in a freezer bag. They’ll keep for three months and you can bake straight from frozen. Just add a minute or two to the baking time.
Already baked cookies freeze great too, just skip the powdered sugar. Freeze for up to two months, thaw on the counter, add your kisses if you haven’t already, dust with sugar right before serving.
The dough balls also keep in the fridge for three days before baking, which is perfect when you want to spread out your baking over a few days instead of doing everything at once. I usually make dough Sunday night and bake fresh cookies Monday and Tuesday.
Recipe Notes & Baker’s Tips
If your cookies keep spreading even after proper chilling, your oven might run hot like mine. Drop the temp to 325°F and bake for an extra minute or two. Solved my spreading problem completely.
Sugar-free Jello works but the texture’s a little different. My diabetic aunt uses it and says they’re still good, just not quite as tender.
That almond extract really does something magical to the strawberry flavor. My mom can’t have it because of allergies so she skips it, and her cookies are good but mine are better. She won’t admit it but I know she knows.
Serving Suggestions
These look stunning on a cake stand with fresh strawberries scattered around the bottom. I do this for every party and people always take photos before they eat them. They’re also gorgeous in clear cellophane bags tied with ribbon if you’re giving them as gifts. My kids’ teachers get these every Valentine’s Day now and I’m pretty sure it’s why my kids get extra help with homework.
Serve them with vanilla ice cream for a fancy dessert that took you zero extra effort. The cold ice cream with the soft cookie is perfection. They’re also great with afternoon coffee or tea when you need a little pick-me-up. I keep a stash in my freezer specifically for emergency cookie situations.
How to Store Your Strawberry Kiss Cookies
Airtight container on the counter keeps them fresh for five days. I layer parchment paper between them so the powdered sugar doesn’t get everywhere and the kisses don’t stick together. They’re usually gone within two days at my house though.
If it’s summer and your house is hot, stick them in the fridge. They’ll last a week that way. Just let them sit out for 20 minutes before eating because they taste better at room temperature.
For longer storage, freeze the baked cookies without powdered sugar. They’ll keep for two months. Thaw on the counter and dust with fresh powdered sugar when you’re ready to serve them.
Allergy Information
Contains: Dairy (butter), eggs, wheat (gluten)
May contain: Soy (from chocolate kisses)
Gluten-free option: Haven’t tried this myself but you could use a 1:1 gluten-free flour blend. Texture might be different though.
Dairy-free option: Dairy-free butter and dairy-free chocolate kisses should work. Again, texture won’t be identical but should be close.
Egg-free option: Flax egg might work (mix 1 tablespoon ground flaxseed with 3 tablespoons water, let sit 5 minutes). No promises on texture though.
Questions I Get Asked A Lot
Why did my cookies spread out flat?
Almost always because the dough wasn’t cold enough or your butter was too soft when you started. Make sure those dough balls are really chilled for at least an hour. And check your butter next time – should be soft but still hold its shape, not greasy.
Do I have to use chocolate kisses?
Nope, use whatever you want! White chocolate kisses, peppermint kisses, those caramel-filled ones, even just a chocolate chip works.
My chocolate kisses melted into the cookies—what happened?
Cookies were too hot when you added them. Wait the full 2 minutes, maybe even 3 if your kitchen is really warm. Also check your oven temp with a thermometer because if it’s running hot, that could be your problem.
💬 Tried this recipe? Leave a comment and rating below! I’d love to hear how yours turned out and see photos of your beautiful pink cookies!


