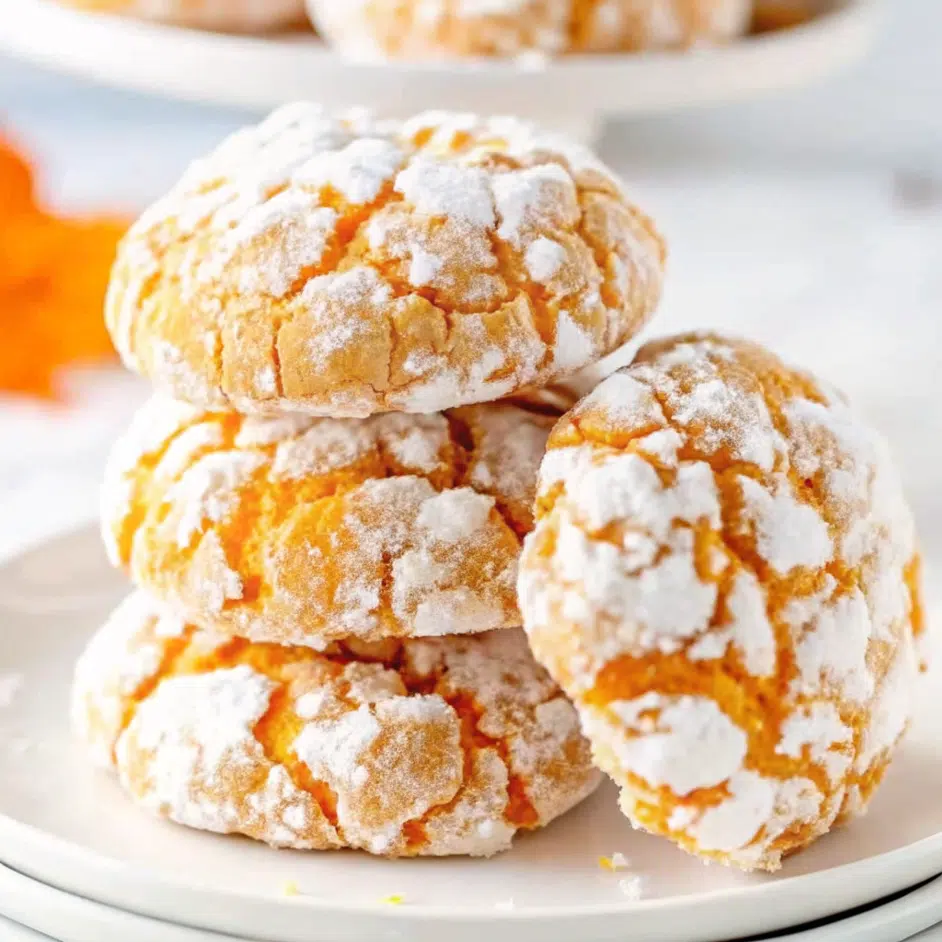
Pumpkin Crinkle Cookies weren’t even part of the plan last Thanksgiving—until I realized the morning of that I’d completely forgotten to make dessert. My mom called at 7 AM asking what I was bringing, and the only thing in my pantry was a can of pumpkin. Four hours later, I walked into dinner with these crackly, golden beauties, and my sister-in-law grabbed my arm and whispered, “I need this recipe. Right now.”
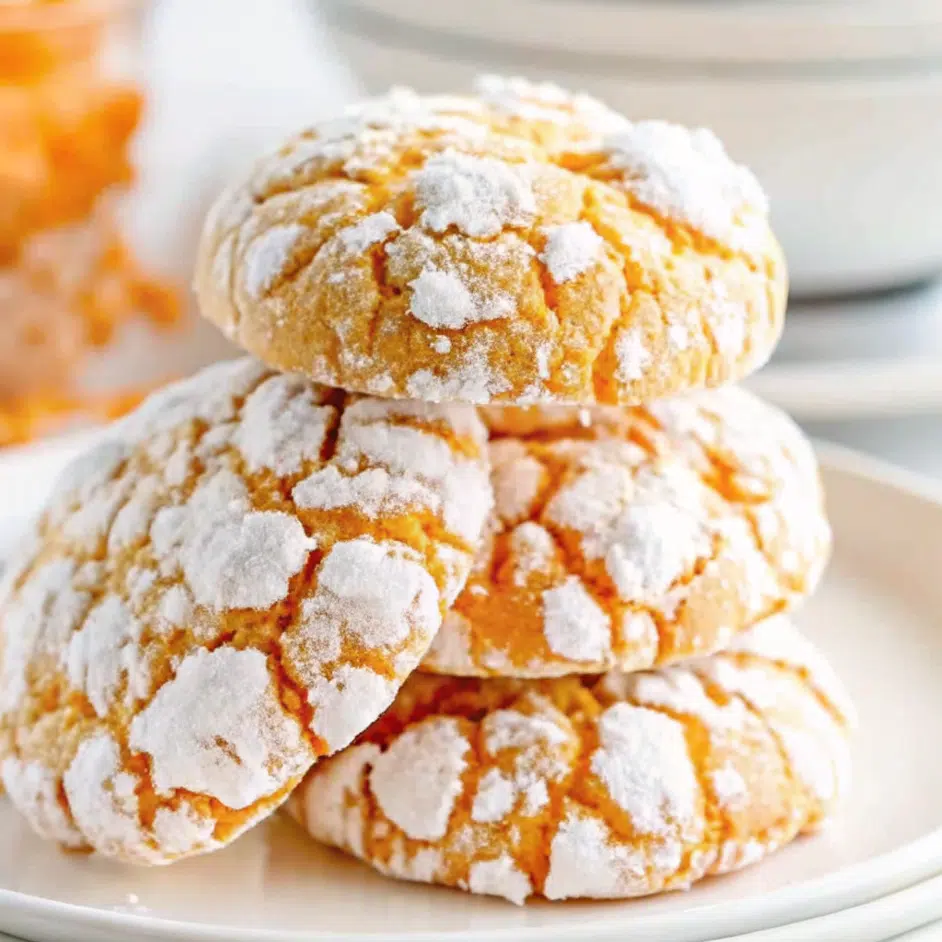
That’s the thing about these cookies—they look fancy but are ridiculously easy to make. The soft, chewy centers taste like pumpkin pie crossed with the perfect snickerdoodle, and that dramatic powdered sugar coating makes it look like you spent hours baking when you really didn’t.
Why You’ll Love This Recipe
Listen, I’m not exaggerating when I say these cookies disappear faster than I can make them. My neighbor Jenny literally knocked on my door at 8 PM last week because she could smell them through her kitchen window. They’re stupid easy to make, use ingredients you probably already have, and that gorgeous crackled look makes everyone think you’re some kind of baking wizard.
Print
Pumpkin Crinkle Cookies
- Total Time: 34 minutes
- Yield: 3 dozen cookies
Description
Soft, chewy pumpkin crinkle cookies made with real pumpkin purée and warm autumn spices, rolled in a double coating of granulated and powdered sugar for that signature crackled appearance. Perfect for fall gatherings, lunch boxes, or any time you crave cozy pumpkin flavors.
Ingredients
For the Cookie Dough:
-
- 2¼ cups all-purpose flour
-
- 2 teaspoons baking powder
-
- ¼ teaspoon baking soda
-
- ½ teaspoon salt
-
- 2 teaspoons pumpkin pie spice
-
- 1 cup packed light brown sugar
-
- ½ cup granulated sugar
-
- 3 large eggs, room temperature
-
- ½ cup canned pumpkin purée (not pumpkin pie filling!)
-
- 1½ teaspoons vanilla extract
-
- 4 tablespoons unsalted butter, melted and cooled
For the Coating:
-
- ⅔ cup granulated sugar
-
- 1 cup powdered sugar
Instructions
- Preheat and prep: Crank your oven to 325°F and line those baking sheets with parchment. Trust me on the temperature – I tried 350°F once and they turned into flat pancakes.
- Mix the dry stuff: Dump the flour, baking powder, baking soda, salt, and pumpkin pie spice in a bowl. Give it a good whisk.
- Wet ingredients time: In your biggest bowl, whisk the sugars, eggs, pumpkin, and vanilla until smooth. My arm gets tired but it’s worth it.
- Butter magic: Pour in that melted butter and whisk like crazy. If your butter’s too hot, you’ll scramble the eggs – learned that one the hard way.
- Bring it together: Fold in the dry ingredients until just mixed. Don’t go nuts here or you’ll get tough cookies.
- Patience, grasshopper: Let the dough sit for 10 minutes. I use this time to set up my sugar stations and clean up a bit.
- Sugar station setup: One bowl with granulated sugar, one with powdered sugar. Make sure you have enough powdered sugar – I ran out once mid-batch and had to send my husband to the store.
- Roll and coat: Scoop the dough, roll in granulated sugar first, then coat those babies in powdered sugar until they look like little ghosts.
- Bake time: Space them out on your sheets – they need room to spread. Pop them in for exactly 14 minutes. Set a timer because these go from perfect to hockey pucks real fast.
- Cool your jets: Let them sit on the hot pan for 10 minutes before moving them. I know it’s torture but they’ll fall apart if you rush this step.
Notes
Cookie scoop is non-negotiable: I tried using spoons for years and my cookies looked like sad, lopsided blobs
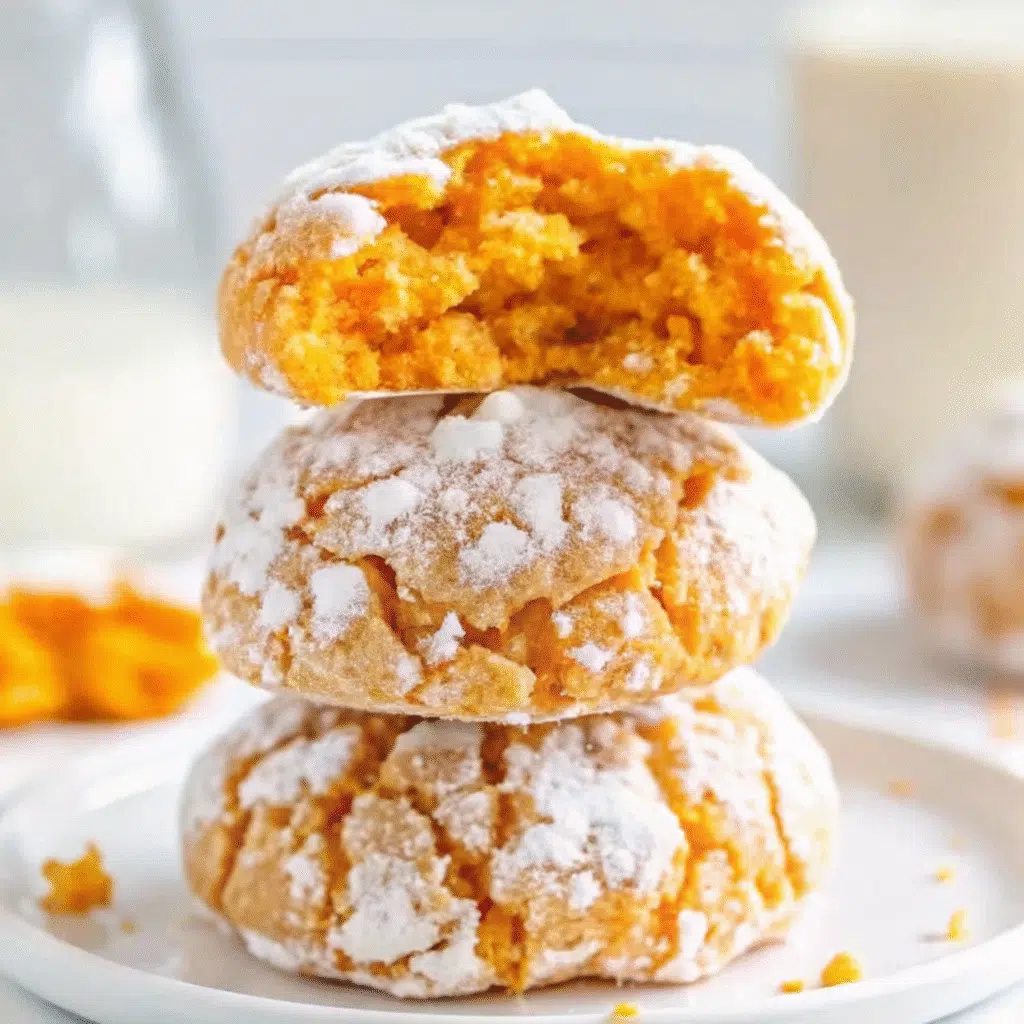
Don’t you dare overbake these: They should look slightly raw in the center cracks – that’s what keeps them soft and chewy
Cold baking sheets are your friend: Hot pans make cookies spread into pancakes instead of staying nice and puffy
Go crazy with the powdered sugar: I literally roll these things until they look like little snowballs – that’s what creates the dramatic cracks
Let that dough rest: Those 10 minutes aren’t optional – the flour needs time to hydrate properly
- Prep Time: 20 minutes
- Cook Time: 14 minutes
- Category: Dessert, Cookies
- Method: Baking
- Cuisine: American
Ingredient List
For the Cookie Dough:
- 2¼ cups all-purpose flour
- 2 teaspoons baking powder
- ¼ teaspoon baking soda
- ½ teaspoon salt
- 2 teaspoons pumpkin pie spice
- 1 cup packed light brown sugar
- ½ cup granulated sugar
- 3 large eggs, room temperature
- ½ cup canned pumpkin purée (not pumpkin pie filling!)
- 1½ teaspoons vanilla extract
- 4 tablespoons unsalted butter, melted and cooled
For the Coating:
- ⅔ cup granulated sugar
- 1 cup powdered sugar
Substitution notes: You can make your own pumpkin pie spice by mixing 1 teaspoon cinnamon, ½ teaspoon ginger, ¼ teaspoon nutmeg, and ¼ teaspoon allspice. If you’re out of brown sugar, you can use all granulated sugar, but the cookies won’t be quite as chewy.
Why These Ingredients Work
Okay, here’s the deal with these ingredients – every single one has a job to do. The pumpkin keeps everything ridiculously moist (I hate that word but it’s true), while the brown sugar creates that perfect chewy bite. I use melted butter instead of softened because it makes the texture denser and more fudgy, kind of like a brownie cookie hybrid. That double sugar coating? Pure genius – the granulated sugar helps them keep their shape while the powdered sugar cracks into those Instagram-worthy white lines when they bake.
Essential Tools and Equipment
- Large mixing bowls
- Wire whisk
- Cookie scoop (1 tablespoon size works perfectly)
- Baking sheets
- Parchment paper
- Wire cooling racks
- Two shallow bowls for the sugar coatings
How To Make Pumpkin Crinkle Cookies
- Preheat and prep: Crank your oven to 325°F and line those baking sheets with parchment. Trust me on the temperature – I tried 350°F once and they turned into flat pancakes.
- Mix the dry stuff: Dump the flour, baking powder, baking soda, salt, and pumpkin pie spice in a bowl. Give it a good whisk.
- Wet ingredients time: In your biggest bowl, whisk the sugars, eggs, pumpkin, and vanilla until smooth. My arm gets tired but it’s worth it.
- Butter magic: Pour in that melted butter and whisk like crazy. If your butter’s too hot, you’ll scramble the eggs – learned that one the hard way.
- Bring it together: Fold in the dry ingredients until just mixed. Don’t go nuts here or you’ll get tough cookies.
- Patience, grasshopper: Let the dough sit for 10 minutes. I use this time to set up my sugar stations and clean up a bit.
- Sugar station setup: One bowl with granulated sugar, one with powdered sugar. Make sure you have enough powdered sugar – I ran out once mid-batch and had to send my husband to the store.
- Roll and coat: Scoop the dough, roll in granulated sugar first, then coat those babies in powdered sugar until they look like little ghosts.
- Bake time: Space them out on your sheets – they need room to spread. Pop them in for exactly 14 minutes. Set a timer because these go from perfect to hockey pucks real fast.
- Cool your jets: Let them sit on the hot pan for 10 minutes before moving them. I know it’s torture but they’ll fall apart if you rush this step.
Expert Tips
My friend’s mom worked at a bakery for 20 years and she swore by using stone-cold baking sheets. She’d stick them in the fridge between batches because the temperature shock makes the cookies puff up fast before they can spread out flat.
You Must Know
Personal Secret: Room temperature pumpkin is everything! I learned this the hard way when I dumped cold pumpkin into my melted butter and ended up with weird little butter chunks throughout my dough. Now I always take the pumpkin out of the fridge about 30 minutes before I start baking.
Pro Tips & Cooking Hacks
- Cookie scoop is non-negotiable: I tried using spoons for years and my cookies looked like sad, lopsided blobs
- Don’t you dare overbake these: They should look slightly raw in the center cracks – that’s what keeps them soft and chewy
- Cold baking sheets are your friend: Hot pans make cookies spread into pancakes instead of staying nice and puffy
- Go crazy with the powdered sugar: I literally roll these things until they look like little snowballs – that’s what creates the dramatic cracks
- Let that dough rest: Those 10 minutes aren’t optional – the flour needs time to hydrate properly
Flavor Variations / Suggestions
Want to shake things up? Here’s what I’ve tried:
- Chocolate chips: Fold in about half a cup of mini chips – my teenagers go crazy for these
- Cream cheese version: Beat in 2 ounces of softened cream cheese with the wet ingredients – so rich and tangy
- Maple twist: Swap the vanilla for maple extract – tastes like fall in Canada
- Kick it up: Add just a tiny pinch of cayenne pepper – my sister thinks I’m weird but it’s actually amazing
- Orange zest: One orange worth of zest makes them bright and fresh – perfect for Thanksgiving
Make-Ahead Options
These are perfect for getting ahead of the game:
- Dough in the fridge: Make the dough, cover it tight, and it’ll keep for 2 days – actually gets better as the flavors meld
- Freeze the dough balls: Scoop, coat, and freeze them on a tray, then toss in a freezer bag – they’ll keep for months
- Bake from frozen: Just add a couple extra minutes to the timer – I do this for unexpected company all the time
Recipe Notes & Baker’s Tips
Here’s what I wish someone had told me when I first started making these: that double sugar coating isn’t just for looks – it’s science! The granulated sugar creates structure while the powdered sugar makes those gorgeous cracks as the cookies puff up. Also, don’t even think about cranking up the oven temperature to speed things up – 325°F is the sweet spot for even baking without turning them into hockey pucks.
Serving Suggestions
These cookies are perfect with:
- Ice cold milk (obviously)
- Hot coffee for dunking
- Apple cider while sitting on the porch
- Packed in school lunch boxes (my kids’ friends always ask for the recipe)
- Vanilla ice cream when you want to get fancy
I really hope these become your new fall obsession! There’s something magical about pulling a tray of these from the oven and watching everyone’s faces light up. Drop a comment and let me know how yours turned out – I love hearing about your baking adventures!
How to Store Your Pumpkin Crinkle Cookies
- Counter storage: Airtight container keeps them soft for about 4 days – if they last that long
- Freezer life: These freeze like champs for up to 2 months, just wrap them well
- Warming up: Ten seconds in the microwave and they taste like they just came out of the oven
Allergy Information
What’s in them: Wheat, eggs, dairy Swapping stuff out:
- No gluten? Use that 1:1 flour blend everyone talks about
- No dairy? Solid coconut oil works instead of butter – just don’t melt it
- No eggs? I’ve heard flax eggs work but haven’t tried it myself – 3 tablespoons ground flaxseed mixed with 9 tablespoons water
Questions I Get Asked A Lot
Why don’t my cookies crack nicely?
You’re probably skimping on the powdered sugar or using hot baking sheets. I coat mine until they look like little snowballs, and I always use cold pans.
Can I use fresh pumpkin instead of canned?
Sure, but make sure it’s not watery or your cookies will be flat. I stick with canned because it’s consistent and I’m lazy.
How can I make them larger?
Use a bigger scoop and add a few more minutes to the baking time. My husband likes them huge so I sometimes make monster ones.
Why do my cookies turn out flat?
Either your dough is too warm or your baking sheets are hot. Cool everything down and try again.
Can I make these ahead for a party?
Absolutely! They actually taste better the next day when the flavors have had time to get cozy together.
💬 Made these cookies? I want to hear everything! Did they turn out as crackly as mine? Did you try any of the variations? Drop a comment and let me know how it went – I read every single one and love hearing about your kitchen adventures!

