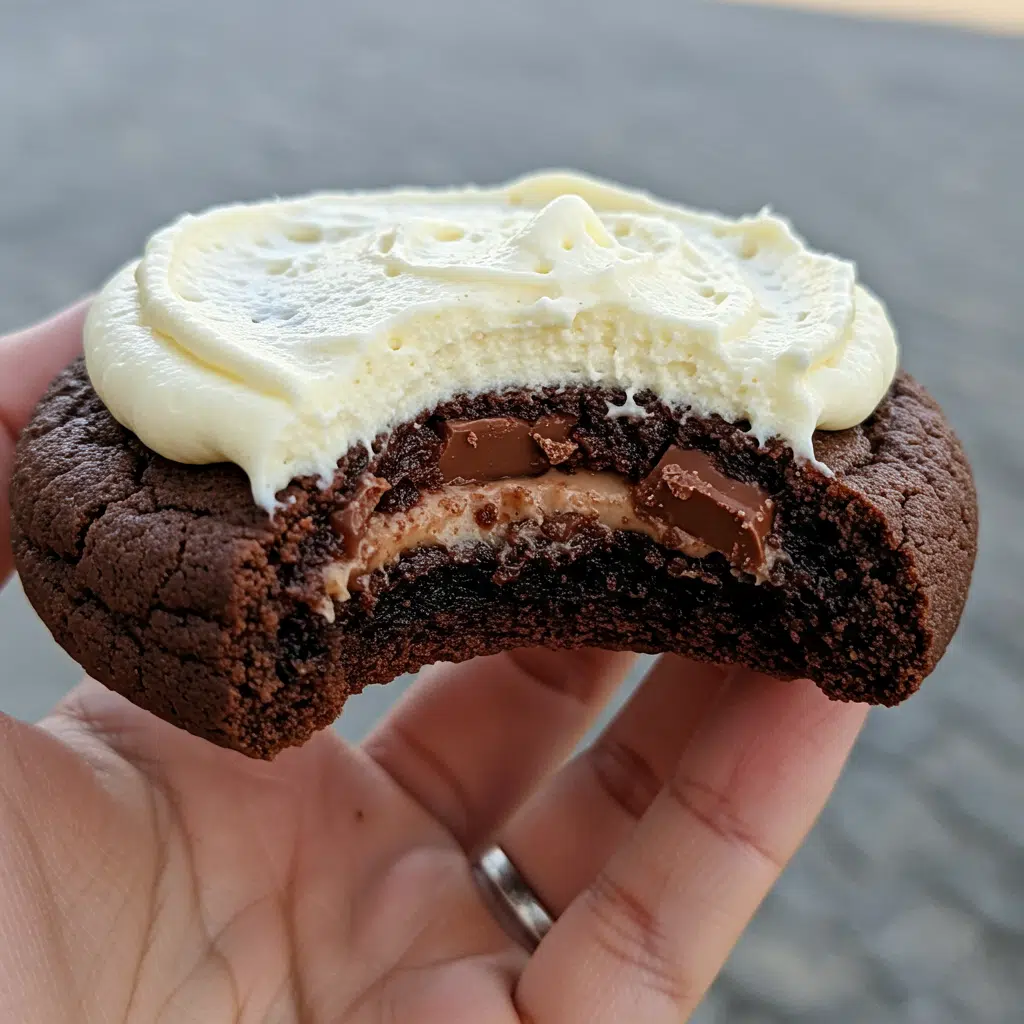
Crumbl Chocolate Chip Cookies are thick, soft, and gooey in the center, with perfectly crispy, caramelized edges. Each bite is huge and indulgent, making them feel like a treat straight from a bakery. The best part? They’re surprisingly easy to make at home, so you don’t have to drop a fortune on a box. Once you try one, you’ll be thinking about them nonstop—just like I do!
Love Chocolate Chip Cookies ? Try My Pumpkin Chocolate Chip Cookies or this Pumpkin S’mores Cookies next.
Why You’ll Love This Recipe
These cookies are massive, soft, and utterly irresistible. The edges turn golden and crispy while the center stays gooey and tender, like the best cookie dough but even better. They stay soft for days, and everyone who tries them can’t stop raving.
Print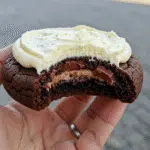
Crumbl Chocolate Chip Cookies
- Total Time: 30 minutes
- Yield: 12 cookies
Description
Oversized chocolate chip cookies cooling on parchment-lined baking sheet, showing perfect Crumbl-style thickness with golden brown edges and gooey centers, extra chocolate chips visible on top
Ingredients
Cookie Dough:
- 1½ cups salted butter (has to be room temp)
- ¾ cup regular sugar
- 1½ cups brown sugar (packed down tight)
- 2 big eggs
- 1½ tablespoons vanilla extract
- 4¼ cups flour (sometimes need more – see my notes)
- 2 teaspoons baking soda
- 1 teaspoon baking powder
- 1 teaspoon salt
Chocolate:
- 2 cups milk chocolate chips (I use whatever’s on sale)
- Extra chips for sticking on top
Instructions
Heat your oven to 375. Don’t skip preheating – temperature matters with these. Put parchment paper on your cookie sheets.
Cream the butter with both sugars in your mixer. Takes about four minutes and you’ll know it’s ready when it looks fluffy and pale yellow. Don’t rush this part. My first batches I creamed for like one minute and they came out dense.
Add eggs one at a time, beating after each one. Then add vanilla and beat until it all looks smooth and lighter. Should look almost like frosting at this point.
Mix flour, baking soda, baking powder, and salt in another bowl. Don’t skip this step. My grandma always mixed dry ingredients first and she made the best cookies ever.
Add the flour stuff to the butter stuff and mix just until you can’t see white flour anymore. Stop there. Don’t keep mixing till it’s smooth because that makes them tough. Should look a little rough.
Stir in chocolate chips with a wooden spoon. Save some chips to stick on top because that’s what makes them look like the real ones.
Scoop with your big cookie scoop and roll into balls with your hands. They should be tennis ball sized. Put only six on each sheet because they spread like crazy. I learned this the hard way when I put eight on a sheet and they all grew together.
Press each ball down just a little and stick extra chocolate chips on top. Looks more professional.
Bake 12 to 15 minutes. Here’s the scary part – they should look raw in the middle when you take them out. Edges will be golden but centers look underbaked. They keep cooking on the hot pan. I overbaked my first three batches because I was scared of raw cookies.
Let them sit on the cookie sheet for exactly twenty minutes. Set a timer. I used to try moving them earlier and they fell apart. That twenty minutes on the hot pan is what makes the texture perfect.
Notes
Room temperature butter is everything. Take it out an hour before baking. Cold butter won’t cream right and you get weird lumpy cookies. If you forget, cut it up small and microwave for ten seconds.
These look wrong when they’re actually perfect. Center should look raw and puffy when you take them out. I know it feels scary but trust it. They look perfect after cooling.
For really thick cookies, stick the dough balls in the fridge for thirty minutes before baking. Cold dough doesn’t spread as much. I do this when company’s coming over.
Never put more than six cookies per sheet. Need space to spread or they stick together and bake weird. Learned this destroying a whole batch.
- Prep Time: 15 minutes
- Cook Time: 15 minutes
- Category: Dessert
- Method: Baking
- Cuisine: American
Ingredient List
Cookie Dough:
- 1½ cups salted butter (has to be room temp)
- ¾ cup regular sugar
- 1½ cups brown sugar (packed down tight)
- 2 big eggs
- 1½ tablespoons vanilla extract
- 4¼ cups flour (sometimes need more – see my notes)
- 2 teaspoons baking soda
- 1 teaspoon baking powder
- 1 teaspoon salt
Chocolate:
- 2 cups milk chocolate chips (I use whatever’s on sale)
- Extra chips for sticking on top
Substitution Notes: Any chocolate chips work fine. I’ve used store brand, Nestle, whatever. For butter I always use the salted Land O Lakes sticks but my sister uses unsalted and adds more salt. Brown sugar needs to be packed tight or you won’t get enough. If it’s hard as a rock, microwave it with a wet paper towel for like thirty seconds.
Why These Ingredients Work
Brown sugar is everything here. Has molasses which makes them chewy and gives that caramel taste. Made them with all white sugar once when I ran out and they came out totally wrong – crispy and boring. The molasses is what keeps them soft for days too.
That much vanilla sounds crazy but it’s what makes them taste like expensive bakery cookies. Regular recipes use one teaspoon. We’re using a tablespoon and a half because that’s the secret. My mom worked at a bakery in the eighties and she told me they always used way more vanilla than home recipes.
All that flour keeps them thick. I know it looks like too much but trust me. First time I made them I thought it was a typo and used less. They spread into one giant sheet-pan cookie. Looked ridiculous but tasted amazing.
The baking soda and baking powder both do different jobs. Baking soda makes them brown and get crispy edges. Baking powder makes them fluffy inside. Need both or they come out weird.
Salted butter just tastes better than unsalted. Don’t know why recipes always say unsalted when salted is right there being more delicious. The salt makes all the flavors pop.
Essential Tools and Equipment
Nothing fancy needed which is why I love this recipe:
- Big mixing bowl (mine’s plastic from Target)
- Hand mixer or stand mixer if you have one
- Cookie scoop – the big kind that holds like half a cup
- Cookie sheets – need at least two
- Parchment paper (don’t skip this unless you want to scrub cookies off your pan)
- Wire racks for cooling
How To Make Crumbl Chocolate Chip Cookies
Heat your oven to 375. Don’t skip preheating – temperature matters with these. Put parchment paper on your cookie sheets.
Cream the butter with both sugars in your mixer. Takes about four minutes and you’ll know it’s ready when it looks fluffy and pale yellow. Don’t rush this part. My first batches I creamed for like one minute and they came out dense.
Add eggs one at a time, beating after each one. Then add vanilla and beat until it all looks smooth and lighter. Should look almost like frosting at this point.
Mix flour, baking soda, baking powder, and salt in another bowl. Don’t skip this step. My grandma always mixed dry ingredients first and she made the best cookies ever.
Add the flour stuff to the butter stuff and mix just until you can’t see white flour anymore. Stop there. Don’t keep mixing till it’s smooth because that makes them tough. Should look a little rough.
Stir in chocolate chips with a wooden spoon. Save some chips to stick on top because that’s what makes them look like the real ones.
Scoop with your big cookie scoop and roll into balls with your hands. They should be tennis ball sized. Put only six on each sheet because they spread like crazy. I learned this the hard way when I put eight on a sheet and they all grew together.
Press each ball down just a little and stick extra chocolate chips on top. Looks more professional.
Bake 12 to 15 minutes. Here’s the scary part – they should look raw in the middle when you take them out. Edges will be golden but centers look underbaked. They keep cooking on the hot pan. I overbaked my first three batches because I was scared of raw cookies.
Let them sit on the cookie sheet for exactly twenty minutes. Set a timer. I used to try moving them earlier and they fell apart. That twenty minutes on the hot pan is what makes the texture perfect.

Expert Tips
Personal Secret: Flour amount changes with weather. Rainy days need more flour, dry days need less. Start with 4¼ cups but add more tablespoon by tablespoon if dough feels too sticky. Should hold together when you scoop it but not be dry and crumbly.
Pro Tips & Cooking Hacks
Room temperature butter is everything. Take it out an hour before baking. Cold butter won’t cream right and you get weird lumpy cookies. If you forget, cut it up small and microwave for ten seconds.
These look wrong when they’re actually perfect. Center should look raw and puffy when you take them out. I know it feels scary but trust it. They look perfect after cooling.
For really thick cookies, stick the dough balls in the fridge for thirty minutes before baking. Cold dough doesn’t spread as much. I do this when company’s coming over.
Never put more than six cookies per sheet. Need space to spread or they stick together and bake weird. Learned this destroying a whole batch.
Common Mistakes to Avoid: Don’t overmix after adding flour. Just mix till combined and stop. I killed so many batches mixing too much.
Don’t move them too early. They need that full twenty minutes on the pan or they crumble. I’ve wasted entire batches being impatient.
Don’t use melted butter even if you’re in a hurry. Makes flat spread-out cookies instead of thick ones.
Check your baking soda date. Old stuff doesn’t work. Mine expired two years ago and I couldn’t figure out why my cookies were flat.
Flavor Variations & Suggestions
Once you nail the basic recipe, try different stuff. My favorite is half chocolate chips, half Heath toffee bits. Tastes like those fancy expensive cookies.
Brown butter version is incredible if you want to show off. Brown the butter in a pan till it smells nutty, then cool it completely before using. Takes forever but tastes amazing.
Double chocolate cookies – replace half a cup of flour with cocoa powder and use dark chocolate chips. My husband’s obsessed with these. So rich you can only eat like half.
Sea salt on top before baking makes people think you’re a professional. Just sprinkle tiny bit of fancy salt on each cookie. Game changer.
Holiday versions – white chocolate chips and dried cranberries, or add cinnamon for snickerdoodle vibes. My kids love rainbow sprinkles mixed in for birthday parties.
Make-Ahead Options
Dough keeps in the fridge for three days and actually gets better. Flavors develop or whatever. Cover it tight with plastic wrap.
You can scoop them and freeze the balls for months. Just stick the sheet in the freezer till they’re hard, then throw them in freezer bags. Bake straight from frozen but add two extra minutes.
Finished cookies freeze perfect too. Wrap each one in plastic wrap then put them all in a big freezer bag. Good for three months. Thaw on the counter for like half an hour.
Make them day before parties. They’re actually better next day because everything settles. Store in tupperware with tight lid.
Recipe Notes & Baker’s Tips
Size matters. Don’t make them smaller thinking you’ll get more. Small ones don’t have the right ratio of crispy to chewy. These are supposed to be ridiculously big.
Every oven is different so watch your first batch. My old oven ran hot so I baked at 365. New oven takes extra two minutes. Figure out yours and then you’re set.
Different chocolate chip brands behave different when they melt. Expensive ones like Ghirardelli stay nice and melty. Cheap ones sometimes get weird. But honestly they all taste good so use whatever.
If yours spread too much, butter was too warm or need more flour. If they don’t spread enough and stay too thick, butter was too cold or too much flour. Takes couple batches to figure it out.
Humidity affects everything. Summer cookies need more flour. Winter cookies sometimes need less. Keep notes so you remember next time.
Serving Suggestions
One cookie feeds two people but good luck telling my family that. These are legitimately a meal. Rich and filling like nothing else.
Perfect with cold milk. That’s the classic way and honestly the best. Cold milk, warm cookie, perfection.
Amazing with vanilla ice cream if you want full dessert mode. Sometimes make ice cream sandwiches with slightly soft cookies. Incredible.
For fancy occasions, dust with powdered sugar or drizzle melted chocolate. Takes thirty seconds but looks professional.
Great for potlucks because they’re so impressive. People always think they’re way harder than they are. Get more compliments on these than anything else I make.
Cut them in quarters for little kids. Whole cookie is too much sugar for anyone under ten. My four year old nephew eats one quarter and bounces off walls for hours.
How to Store Your Crumbl Chocolate Chip Cookies
Room Temperature: Airtight container, good for five days. Put parchment between layers or they stick. Stay soft the whole time which is crazy compared to regular cookies.
Refrigerator: Keep for week in fridge. Kids eat them cold like cookie popsicles. Texture changes but still good.
Freezer: Wrap each one in plastic wrap, then big freezer bag. Last three months. Thaw on counter thirty minutes. Sometimes eat them half frozen because they’re like cookie ice cream.
Reheating: Microwave ten seconds to warm up. Don’t overdo it or they get tough. Just want to take the chill off.
Allergy Information
Has: Eggs, dairy, wheat, maybe soy depending on chips
Dairy-Free: Use plant butter and dairy-free chips. Made them this way for my friend’s kid and they’re almost identical.
Gluten-Free: Use Cup4Cup flour or King Arthur blend. Add teaspoon xanthan gum if not included. Different texture but still really good.
Egg-Free: Flax eggs work okay. Two tablespoons ground flax with six tablespoons water, let sit five minutes. Little different but edible.
Questions I Get Asked A Lot
Why do mine spread too much and come out flat?
Butter too warm when you started or need more flour. Dough should hold its shape when scooped. Also check baking soda expiration.
Can I use mini chocolate chips?
Sure but they disappear and don’t give you those melty pockets. Regular chips way better for authentic taste.
How do I get them thick like real Crumbl?
Don’t skip the twenty minute cooling on the pan and don’t overbake. Should look raw when you take them out. Chilling dough balls helps too.
Can I make them smaller?
Yeah but different texture. Won’t have same crispy edge to gooey center ratio. If you do, bake eight to ten minutes instead.
Why better next day? Flavors get better overnight. Same reason chili tastes better next day. Everything settles and improves.
Mine came out too hard and crunchy. What happened?
Overbaked them. Should look underdone when you take them out. Also maybe too much flour or old eggs.
Can I double the recipe?
Sure but your mixer might struggle. Big recipe. Might be easier to make two batches.
Do I have to use parchment paper?
Yes unless you want to spend hour scraping cookies off your pans. Trust me on this one.
These completely changed my weekend routine. Make them every Saturday morning and they’re gone by Sunday night. House smells incredible and everyone thinks I’m amazing baker when really I just figured out how to copy Crumbl. Best part is making dozen costs same as buying two from store.
💬 Made these? Tell me how yours turned out! Love hearing everyone’s stories.


