Description
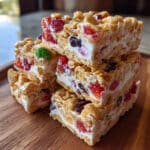
Easy No-Bake Yogurt Cereal Bars recipe! Made with Greek yogurt, crunchy cereal, and your favorite mix-ins. Ready in 10 minutes, perfect for meal prep. Customizable, kid-friendly, and delicious!
Ingredients
Base & Binder
- 4 cups cereal (crunchy, unsweetened or lightly sweetened — like puffed rice, cornflakes, or a mix)
- 2 cups plain or vanilla yogurt (Greek or regular)
- 2–4 tablespoons honey or maple syrup (to taste)
- 1 teaspoon vanilla extract (optional)
Add-Ins (Optional)
- ½–1 cup fresh fruit (berries, sliced banana, diced apples)
- ½ cup chopped nuts (almonds, pecans, walnuts)
- ½ cup dried fruit (raisins, cranberries, chopped apricots)
- ¼ cup seeds (chia, flax, pumpkin)
- Zest of ½ lemon or orange (for flavor)
Topping (Optional)
- Drizzle of melted chocolate or peanut butter
- Extra cereal clusters
- Shredded coconut
Instructions
Line an 8×8-inch baking pan with parchment paper, leaving about 2 inches of overhang on two opposite sides. Lightly grease the parchment with cooking spray or a tiny bit of oil.
In a large bowl, stir together the yogurt, honey (or maple syrup), and vanilla extract until the mixture is smooth and slightly glossy. Taste it at this point — if you want it sweeter, add another tablespoon of honey.
Add the cereal to the bowl with your yogurt mixture. If you’re using any add-ins like nuts, seeds, dried fruit, or fresh fruit, toss them in now too.
Transfer the mixture into your prepared pan. Use a spatula or your hands to press everything down FIRMLY and evenly into the pan. The tighter you pack it, the better your bars will hold together when you cut them. Don’t be shy here.
Cover the pan with plastic wrap or a lid and pop it in the refrigerator for at least 2–4 hours. But honestly? If you can wait overnight, do it. The bars will be much firmer and easier to cut into clean slices.
Once the mixture is firm and set, lift it out of the pan using those parchment paper handles you created earlier. Place it on a cutting board and use a sharp knife to cut into 12–16 bars, depending on how big you want them.
Drizzle melted chocolate or peanut butter over the tops in a zigzag pattern, sprinkle on some extra cereal clusters for texture, or add a light dusting of shredded coconut.
Notes
- Layer your flavors: Add a thin layer of nut butter at the bottom of the pan before pressing in the mixture for a hidden surprise.
- Freeze for firmer bars: If you’re making these in summer or want them ultra-firm, pop them in the freezer for an hour after the initial chill.
- Avoid cereal sogginess: Don’t let the cereal sit in the yogurt mixture for more than a few minutes before pressing into the pan. Work quickly!
- Double batch wisdom: This recipe doubles beautifully. Use a 9×13-inch pan and make enough for two weeks of breakfasts.
- Test the sweetness: Always taste your yogurt base before adding the cereal. It’s way easier to adjust sweetness at that stage.
- Prep Time: 10 minutes
- Cook Time: Chill Time: 2–4 hours (or overnight)
- Category: Snack
- Method: No-Bake, Refrigerated
- Cuisine: American