Description
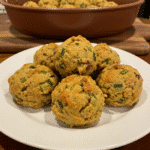
Crispy golden Thanksgiving stuffing balls made with dried bread cubes, butter, celery, onion, and herbs. Baked to perfection with a crunchy exterior and soft, flavorful interior. Perfect make-ahead side dish for holiday dinners.
Ingredients
For the Stuffing Balls:
- 1 loaf white bread, cut into bite-sized pieces (left to dry under a towel for 1–3 days)
- ½ lb (about 226 g) butter (that’s 2 sticks — yes, it’s a lot, and yes, it’s WORTH IT)
- 1 cup chicken broth (you may not use all of it)
- 1 cup celery, finely diced
- 1 small onion, finely diced
- 2 teaspoons salt
- 1–2 tablespoons minced parsley (fresh or dried)
Substitution Notes:
- Use whole wheat or sourdough bread for a heartier flavor
- Swap chicken broth for vegetable broth to make it vegetarian-friendly
- Fresh herbs like sage, thyme, or rosemary can be added for extra holiday flavor
- Use dairy-free butter if needed
Instructions
Chop up the bread into chunks. Not massive, not crumbs. Spread them out and cover with a towel. Leave them sitting on your counter for one to three days. Yeah it’s a long time but that’s the whole trick. The bread gets hard.
If you forgot, stick them in a 200°F oven for 30-45 minutes and stir them around sometimes. Not as good but whatever, it works when you’re desperate.
Oven to 350°F. Melt butter in a pan, throw in the onion and celery. Cook for 5-7 minutes until they’re soft and smell right. Onion should be see-through.
Dump the dried bread in a bowl. Sprinkle parsley on it. Pour all the butter and vegetables over everything and mix with your hands.
Now listen – pour in like a quarter cup of broth and mix. Grab some and squeeze it. Does it hold together? Cool. Falls apart? Add a tiny bit more. Feels wet? You messed up. I use maybe half to three-quarters of the cup. Stop when it barely sticks together.
Put parchment paper on your pan. Grab a handful and squeeze it really hard into a ball about baseball-sized. I mean really squeeze or it’s going to fall apart later. Put them on the pan with space between. Cover with foil.
They look rough at this stage, don’t worry about it.
Bake covered 30 minutes. Pull them out, flip each one carefully with a spatula. They’re kind of delicate so don’t throw them around. Cover again, bake 15 more minutes.
Take off the foil, flip them again, bake uncovered 10-15 minutes until they’re brown and crispy. That’s it.
Notes
- Flip carefully during the first bake. The balls will be more delicate before they’re fully cooked. Use a wide spatula and support them from underneath.
- Don’t overcrowd the baking sheet. Give each ball some breathing room so the hot air can circulate and crisp up all sides evenly.
- Season boldly. Dried bread soaks up a lot of flavor, so don’t be shy with the salt. Taste your mixture before shaping (yes, even with raw onion!) and adjust seasoning if needed.
- Common mistake to avoid: Shaping the balls too loosely. Really pack them tight! Loosely formed balls will fall apart during flipping.
- Smart shortcut: Use pre-cut stuffing cubes from the store and skip the drying step — they’re already dried and ready to go! Just look for plain cubed bread, not the seasoned stuffing mix.
- Prep Time: 15 minutes
- Cook Time: 55 minutes
- Category: Side Dish
- Method: Baking
- Cuisine: American