Description
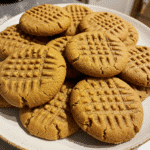
These classic peanut butter cookies are incredibly soft, chewy, and loaded with rich peanut butter flavor. Made with simple pantry ingredients and ready in just 15 minutes, they’re perfect for any occasion.
Ingredients
What you’ll need:
- 1 ½ cups (180 g) all-purpose flour
- ½ teaspoon baking powder
- ½ cup (113 g) unsalted butter, room temperature
- 1 cup (250 g) creamy peanut butter
- ½ cup (100 g) brown sugar, lightly packed
- ½ cup (100 g) granulated sugar
- 1 teaspoon vanilla extract
- 1 large egg, room temperature
My swap-out notes:
- Got natural peanut butter? Stir it really well first or your cookies will be weird and oily
- Chunky works if you want little peanut bits everywhere
- Only have salted butter? Use it, just don’t add extra salt
- No brown sugar? Use all white sugar but they won’t be as chewy
Instructions
Set your oven to 350°F and line a baking sheet with parchment. Don’t skip the parchment – I learned this lesson when I scraped half my cookies off a sticky pan last Christmas.
Whisk flour and baking powder in a medium bowl. I actually sift mine because my grandmother always did, and her cookies were legendary.
Beat butter with both sugars until fluffy – about 3 minutes with my old stand mixer. This step makes or breaks your cookies, so don’t rush it.
Mix in your peanut butter until smooth. I use Jif because that’s what my kids prefer, but any creamy brand works beautifully.
Add the egg and vanilla, beating until everything looks uniform. Make sure your egg is room temperature or it won’t mix properly.
Add flour mixture on low speed until just combined. Overmixing makes tough cookies – something I definitely learned the hard way.
Roll into walnut-sized balls and space them 2 inches apart on your prepared sheet. They spread just enough to look perfect.
Press each ball with a fork in both directions. This isn’t just pretty – it helps them bake evenly and gives that nostalgic look we all remember.
Bake exactly 10 minutes. They’ll look slightly underdone, but trust me on this timing – they finish cooking on the hot pan.
Let them cool completely on the baking sheet. I know it’s torture, but moving them too early turns perfect cookies into crumbly messes.
Notes
After making these cookies probably 500 times, here’s what I’ve figured out. Cold ingredients are your enemy – everything needs to be room temperature or your cookies will be lopsided and weird. I take my butter and egg out an hour before baking.
Don’t overbake them! They should look slightly soft in the middle when you pull them out. My husband always thinks I’m underbaking them, but then he eats half the batch, so clearly I’m doing something right.
If your dough feels too sticky, stick it in the fridge for 20 minutes. I do this sometimes when it’s humid outside – the dough cooperates much better after a little chill time.
- Prep Time: 5 minutes
- Cook Time: 10 minutes
- Category: Dessert
- Method: Baking
- Cuisine: American