Description
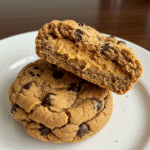
The ultimate thick and chewy peanut butter chocolate chip cookies made with creamy peanut butter, two types of sugar, and plenty of chocolate chips. These bakery-style cookies are perfectly soft in the center with lightly golden edges and incredible flavor in every bite.
Ingredients
Dry Ingredients:
- 2½ cups all-purpose flour (spooned & leveled)
- 1 teaspoon baking powder
- 1 teaspoon baking soda
- ½ teaspoon salt
Wet Ingredients:
- 1 cup unsalted butter, room temperature
- 1 cup granulated sugar
- ¾ cup packed light brown sugar
- 2 large eggs, room temperature
- 2 cups creamy peanut butter
- 2 teaspoons pure vanilla extract
Mix-ins:
- 2 cups semi-sweet chocolate chips
- Optional: ½ cup granulated sugar (for rolling)
Instructions
Whisk flour, baking powder, baking soda, salt in bowl. Takes thirty seconds. Don’t dump everything together – you want even distribution so nobody gets a bite that’s all salt.
Beat butter with both sugars until fluffy and light colored. About 3 minutes with electric mixer. Should look almost white and way bigger in volume. Don’t rush this – creates air pockets that make cookies tender instead of dense.
Beat in eggs one at a time. Let each one fully mix before adding the next. Scrape bowl sides with rubber spatula – butter always hides in corners. Add peanut butter and vanilla. Mix until smooth and thick-looking.
Add flour mixture on low speed. Mix just until no dry flour shows. Overmixing makes tough cookies. Nobody wants tough cookies. Pour in chocolate chips with mixer on low. Dough will be really thick – that’s right.
Cover with plastic wrap, stick in fridge at least an hour. I usually make dough morning and bake afternoon, or make night before. Cold dough spreads less, means thicker cookies instead of thin crispy ones. Dough keeps three days in fridge.
Heat oven to 350°F. Line baking sheets with parchment. Don’t skip parchment – prevents sticking, makes cleanup easy. If your oven runs weird, use thermometer. Temperature matters more with cookies than almost anything else.
Scoop big portions – 3 tablespoons each. I roll mine in sugar because I like extra sweetness and sparkly look. Space them 2 inches apart minimum. They spread some and you don’t want one giant mega-cookie.
14-15 minutes until edges look set and light golden but centers still look soft, maybe slightly underdone. Hardest part for most people – trusting they’re done when centers look raw. They’re not raw, they’re perfect. Keep cooking on hot pan after you pull them out.
Cool on baking sheets exactly 10 minutes. Not 5, not 15. Ten minutes lets them set without getting soggy but still warm enough to move without breaking. Want bakery look? Press extra chocolate chips into tops while warm. Then move to wire racks.
Notes
Make them big. Small cookies lose that chewy center that makes these special.
Test doneness by pressing center with finger at 14 minutes. Springs back = done. Leaves dent = needs more time. Took me years to learn this but it’s foolproof.
Save ¼ cup chips just for pressing into warm tops. Makes them look bakery-perfect.
Don’t open oven door first 10 minutes. Drops temperature, causes uneven baking. Set timer and trust it.
Let baking sheets cool completely between batches. Hot pans make dough spread immediately and bake weird.
“Slightly underdone” look is everything. Cookies keep cooking on hot pan after you remove them. What looks underbaked becomes perfect after cooling. Overbaked so many batches before learning this.
- Prep Time: 20 minutes
- Cook Time: 15 minutes + Chill Time: 1 hour
- Category: Dessert
- Method: Baking
- Cuisine: American