Description
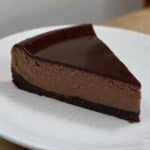
A decadent no-bake chocolate cheesecake featuring a chocolate cookie crust and an incredibly smooth, mousse-like filling made with melted chocolate, cream cheese, and freshly whipped cream. This make-ahead dessert requires no baking and sets up beautifully in the refrigerator, making it perfect for entertaining or any chocolate craving!
Ingredients
For the Oreo Crust:
- 25 classic Oreo or chocolate sandwich cookies (do not remove filling)
- 4 tablespoons melted salted butter
For the Chocolate Cheesecake Filling:
- 8 oz finely chopped 60% or semisweet chocolate
- 16 oz cream cheese, softened to room temperature (use full-fat, brick-style cream cheese)
- 1 1/4 cups powdered sugar, divided
- 1 teaspoon vanilla extract
- 1/3 cup sour cream
- 1 1/4 cups heavy cream
For Topping:
- Homemade whipped cream (optional but highly recommended!)
Instructions
Dump your Oreos in the food processor – cream and all – and blitz until they look like dark sandy beach crumbs. Pour in the melted butter and pulse a few times until everything looks wet. When you squeeze a handful, it should clump together and hold its shape.
Dump the buttery crumbs into your springform pan and start pressing. Use the bottom of a measuring cup or a glass – anything flat works – and really pack it down. Press it up the sides too, about an inch or so. You want this crust firm enough that it won’t fall apart when you cut slices later. Set it aside and forget about it. No oven necessary, which still feels like cheating to me.
Chop your chocolate into small pieces – like rice-sized, not pebbles – and toss them in a microwave-safe bowl. Zap for 25 seconds, stir. Another 25 seconds, stir again. Keep doing this until it’s smooth and glossy. Don’t get impatient and blast it for a full minute because chocolate will burn on you faster than you think, and burned chocolate tastes bitter and weird.
Grab your mixer and beat that room temperature cream cheese until it’s totally smooth – no lumps anywhere. Takes about 2 minutes of beating. Then pour in your melted chocolate and mix until it’s all one gorgeous brown color with no streaks.
Dump in 3/4 cup of powdered sugar (save the rest for later!) and your vanilla. Mix it all together until smooth. It’ll be pretty thick at this point – like thick frosting. That’s exactly what you want, so don’t panic.
Pour in the sour cream and stir until you can’t see any white streaks anymore. The mixture will loosen up a bit, which is good. That sour cream tang is what keeps this from being sickeningly sweet – it’s the secret ingredient people can never quite identify.
In a clean bowl, pour your cold heavy cream and the remaining 1/2 cup powdered sugar. Beat with your mixer on medium-high until the cream gets thick and fluffy. You’re looking for stiff peaks – when you pull the beaters out, the cream should stand straight up like little mountains, not flop over. Usually takes 3-4 minutes.
Here’s where it gets real. Scoop about a third of your whipped cream into the chocolate mixture and fold it in gently – this lightens everything up. Then add the rest of the whipped cream and fold with a rubber spatula. Use a scooping motion from the bottom of the bowl up and over.
Pour all that gorgeous chocolate filling into your Oreo crust. Grab an offset spatula (or a regular butter knife works too) and smooth the top. Take a minute to make it pretty – a smooth top means prettier slices later.
Cover the whole thing with plastic wrap and stick it in the fridge. Minimum 4 hours, but honestly overnight is better. The cheesecake needs time to firm up properly.
Notes
Prevent a Soggy Crust: Really pack that crust down hard. Like, use some muscle. A loose crust will soak up moisture from the filling and get weird and mushy. The bottom of a measuring cup or a flat-bottomed glass gives you good leverage for packing.
Avoid Grainy Chocolate: Never nuke chocolate at full power. Always 25-30 seconds, stir, repeat. I learned this after ruining an entire batch of expensive Ghirardelli. Once chocolate goes grainy from overheating, it’s trash. No fixing it.
Easy Pan Release: Before you pop the springform sides off, run a thin knife around the edge of the cheesecake. Just slide it between the crust and the pan. This stops the edges from catching and tearing when you release the spring.
Perfect Slices: Want bakery-perfect slices? Fill a tall glass with hot water. Dip your knife in, wipe it dry, make one cut. Dip again, wipe, cut again. Hot knife = clean cuts. Cold knife = messy dragging.
Common Mistake to Avoid: Don’t try to speed up the setting by throwing it in the freezer. The texture comes out wrong – kind of icy instead of creamy. Just plan ahead and give it time in the fridge.
- Prep Time: 35 minutes
- Cook Time: Chilling Time: 4 hours
- Category: Dessert
- Method: No-bake
- Cuisine: American